How to Plant a Red Maple Tree: When and Where to Plant
- By Henry More
- June 24, 2025
Want to add some vibrant color to your yard? Learning how to plant a red maple tree can be a great way to do it. These trees are known for their stunning red leaves in the fall, and they grow pretty fast, too. But before you get started, there are some important things to know about when and where to plant them. Getting it right from the beginning means your red maple will have the best chance to thrive and look amazing for years to come.
Key Takeaways
- Red maples like a lot of sun, at least six hours a day, or partial sun for four to six hours.
- They grow quickly, adding about 12 to 18 inches in height each year.
- Good soil for red maples is a bit acidic and drains well, but stays moist.
- Planting in spring or fall is usually best for red maples.
- Make sure to pick a spot where the tree will have plenty of room to grow tall and wide.
What Is a Red Maple Tree? Key Facts & Landscape Benefits
Okay, so you’re thinking about planting a red maple? Great choice! These trees are super popular, and for good reason. They’re beautiful, relatively easy to care for, and they grow at a decent pace. Let’s get into what makes them so special.
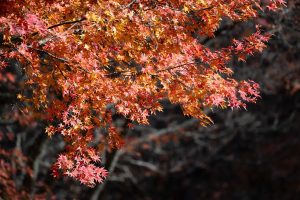
The red maple (Acer rubrum) is a North American native known for its vibrant red foliage, especially in the fall. But it’s not just about the autumn show. These trees offer year-round interest with reddish twigs, flowers, and even seeds.
They’re also pretty adaptable, growing in a range of soil conditions and climates, which is why you see them all over the place. Plus, they provide good shade and can add a lot of value to your property. Just be aware that they can get pretty big, so you’ll need to give them enough space.
Red maples are a fantastic addition to any landscape, offering beauty and shade. They’re relatively low-maintenance, but understanding their needs is key to ensuring they thrive. From selecting the right cultivar to providing proper care, a little knowledge goes a long way in enjoying these trees for years to come.
Here’s a quick rundown of why people love them:
- Stunning fall color: Obviously, the main draw.
- Relatively fast growth: You won’t be waiting forever for it to mature. They average about 12 to 18 inches of height per year.
- Adaptable to different soils: Not too picky about where they grow.
- Provides good shade: Perfect for those hot summer days.
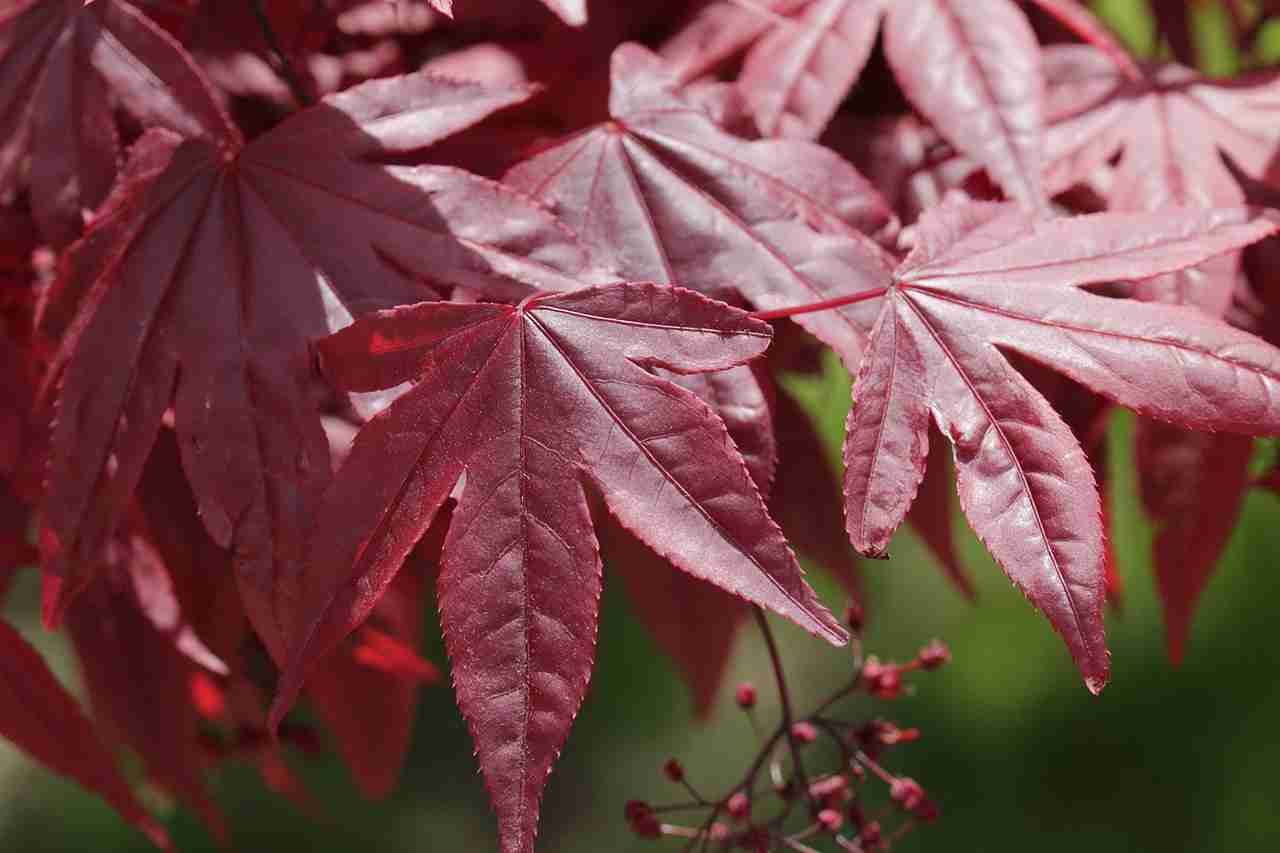
Red maples are sometimes confused with Japanese maples. A key difference is in the leaves. Japanese maples have more “fingers” (lobes) that look hand-like, while red maple trees usually have three to five shorter lobes. There are also many different types of red maples, called cultivars, that have different colors, sizes, and shapes.
Also, good to know: red maples aren’t toxic to people, dogs, or cats, but they are toxic to horses and ponies. So, if you have horses, maybe consider a different tree.
Best Time to Plant Red Maple Trees: Spring vs. Fall
Okay, so you’re thinking about adding a red maple to your yard? Awesome choice! One of the first things to figure out is when to plant a red maple tree. Timing does matter, and you’ve got two good options: spring or fall. Both have their pros and cons, so let’s break it down.
Planting in either season can work, but understanding the nuances can really give your tree the best start. Think of it like this: you want to give your tree the easiest path to thriving, and timing is a big part of that.
Spring Planting
Spring planting is great because the tree gets a whole growing season to establish its roots before winter hits. The soil is warming up, and there’s usually plenty of rain, which helps the tree settle in. However, you need to keep an eye on late frosts, which can damage new growth. Also, you’ll need to be diligent about watering, especially if you have a dry spring.
Fall Planting
Fall planting, on the other hand, lets the tree focus on root development during the cooler months. The top growth slows down, so the tree can put all its energy into establishing a strong root system. Plus, the soil is often still warm from the summer, which encourages root growth. The downside? You need to get the tree in the ground early enough so it has time to establish before the ground freezes solid. Also, you might need to protect it from harsh winter winds or hungry critters.
Ultimately, the best time to plant depends on your local climate and weather patterns. If you have mild winters and consistent rainfall, fall might be ideal. If you have harsh winters and unpredictable springs, spring planting might be a safer bet. Just keep an eye on the weather forecast and be prepared to provide extra care if needed.
Considerations for Success
No matter when you decide to plant, there are a few things to keep in mind. First, make sure you choose a healthy tree from a reputable nursery. Second, prepare the planting site properly by amending the soil and digging a hole that’s the right size. Third, water the tree regularly, especially during the first few weeks after planting. And finally, don’t forget to mulch around the base of the tree to help retain moisture and suppress weeds. Also, consider a root booster for lifelong support.
And speaking of location, you’ll want to think about how far apart to plant red maple trees if you’re planning on planting more than one. Give them enough space to grow and thrive.
Ideal USDA Zones & Climate Conditions for Red Maple Planting
Red maples are pretty adaptable trees, but knowing their preferred climate can really help them thrive. They aren’t too picky, but there are some zones where they’ll be happier and healthier.
USDA Hardiness Zones
Red maples are known for their wide range of tolerance, which is one reason they’re so popular. They generally thrive in USDA hardiness zones 3 through 9. This means they can handle cold winters in the north and relatively warm summers in the south. If you’re in one of these zones, you’re generally good to go!
Temperature and Humidity
These trees can handle a pretty wide range of temperatures and humidity levels. They can survive in both dry and moist environments, from mountain regions to swampy areas. You’ll find them growing as far north as Newfoundland and as far south as the Carolinas. They do best in cooler weather, but they’re pretty resilient.
Sunlight Requirements
Red maples do best when they get plenty of sunlight. Ideally, they need at least six hours of direct sunlight each day. If you can’t provide that much, they can still do okay with four to six hours of partial sun. Just make sure they’re not in a spot that’s completely shaded, or they won’t grow as well. Think about how far to plant a red maple tree from the house to ensure proper sunlight.
Soil Considerations
While red maples are adaptable, they do have some soil preferences. They like well-drained soil that’s a bit acidic. Sandy or loamy soil is ideal. They don’t do well in alkaline or salty soil. If the soil is too alkaline, the leaves might turn pale, and the tree’s growth could be stunted. So, it’s a good idea to test your soil before planting to make sure it’s suitable.
Planting a red maple in the right USDA zone and ensuring it gets enough sunlight and the right kind of soil will set it up for a long and healthy life. While they’re adaptable, giving them the conditions they prefer will help them really flourish.
Choosing the Perfect Location: Sunlight, Space & Soil Requirements
Okay, so you’re ready to plant your red maple! Awesome. But before you just stick it in the ground, let’s talk location, location, location. It’s not just about where you want it; it’s about what the tree needs to thrive. Think of it like finding the perfect apartment – sunlight, enough space, and the right “soil”-dations are key.
Sunlight Needs for Red Maples
Red maples are pretty adaptable, but they do have preferences. Ideally, they love full sun, which means at least six hours of direct sunlight per day. However, they can also handle partial sun, which is around four to six hours. If you live in a hotter climate, some afternoon shade can be beneficial to prevent leaf scorch. I’ve seen some folks in the south plant them where they get morning sun and afternoon shade, and those trees seem to do well. If your yard is mostly shady, a red maple might not be the best choice, or you’ll need to be prepared for slower growth and less vibrant fall color. Remember,maple trees need at least 4 hours of sun per day.
Space Considerations: Above and Below Ground
These trees get BIG. Like, seriously big. We’re talking 40 to 60 feet tall and wide at maturity. So, you need to think long-term. Don’t plant it too close to your house, power lines, or other trees. You don’t want to be dealing with constant pruning or, worse, having to remove a mature tree because it’s causing problems. Also, consider the root system. Red maples have relatively shallow, spreading roots that can sometimes interfere with sidewalks or underground utilities. Give it plenty of room to spread out, both above and below ground. Here’s a quick guide:
- Minimum Distance from House: 20 feet
- Distance from Power Lines: 30 feet (or more)
- Spacing from Other Trees: 25-30 feet
Soil Preferences: Drainage and pH
Red maples aren’t super picky about soil type, but they do have some preferences. They like well-drained, slightly acidic soil. What does that mean? Well-drained means that water doesn’t sit around for too long after it rains. If you have heavy clay soil that stays soggy, you’ll need to amend it with compost or other organic matter to improve drainage. As for pH, slightly acidic means a pH of around 6.0 to 7.0. You can test your soil’s pH with a simple kit from a garden center. If your soil is too alkaline, you can amend it with sulfur or other acidifying agents. Also, make sure the soil is consistently moist, but not excessively wet.
I remember when I first planted my red maple, I didn’t pay enough attention to the soil drainage. After a heavy rain, the water just sat there, and the tree started to look pretty sad. I ended up having to dig it up and amend the soil with a ton of compost. Lesson learned: good drainage is key!
Soil Preparation Tips: Ensuring Acidic, Well-Drained Conditions
Okay, so you’re ready to plant your red maple. Awesome! But before you just stick it in the ground, let’s talk about the soil. Red maples aren’t super picky, but they have preferences. You want to give your tree the best possible start, right? So, let’s get down and dirty (pun intended!).
The key is to create an environment that’s both acidic and well-drained. Red maples thrive in those conditions. Let’s break down what that means and how to achieve it.
Testing Your Soil’s pH
First things first, you need to know what you’re working with. Grab a soil testing kit from your local garden center. They’re pretty cheap and easy to use. Follow the instructions carefully to get an accurate reading. Red maples prefer a soil pH between 5.0 and 6.5. If your soil is too alkaline (above 7.0), you’ll need to amend it. You can also contact loca lextension services to test the soil.
Amending Alkaline Soil
So, your soil is too alkaline? No biggie! There are a few ways to bring that pH down. Here are some options:
- Sulfur: This is a common amendment that slowly lowers the pH over time. Follow the package instructions for application rates.
- Sphagnum Peat Moss: Mix this into the soil to add acidity and improve drainage. It’s a win-win!
- Acidifying Fertilizers: Some fertilizers are specifically designed to lower soil pH while providing nutrients. Look for ones formulated for acid-loving plants.
Improving Drainage
Red maples don’t like to sit in soggy soil. Poor drainage can lead to root rot, which is a major bummer. Here’s how to check your soil’s drainage:
- Dig a hole about 12 inches wide and 12 inches deep.
- Fill the hole with water and let it drain completely.
- Refill the hole with water and time how long it takes to drain. If the water drains in 5-15 minutes, you’re good to go. If it takes longer than 30 minutes, you need to improve drainage.
Adding Organic Matter
No matter what your soil type, adding organic matter is always a good idea. It improves drainage, aeration, and nutrient content. Some good options include:
- Compost: This is decomposed organic matter. It’s like a superfood for your soil.
- Well-rotted manure: Adds nutrients and improves soil structure. Just make sure it’s well-rotted to avoid burning the roots.
- Leaf mold: Decomposed leaves. Another great way to add organic matter and improve drainage.
Preparing the soil properly is like setting the stage for a successful performance. It gives your red maple the foundation it needs to thrive and grow into a beautiful, healthy tree. Don’t skip this step!
Mulching for Success
Once you’ve planted your tree, don’t forget to mulch! Mulch helps retain moisture, suppress weeds, and regulate soil temperature. Use organic mulches like wood chips or shredded bark. Apply a 3-4 inch layer around the base of the tree, but be sure to keep the mulch a few inches away from the trunk to prevent rot. Don’t pile the mulch around the base of the tree or trunk. This is doing more harm than good. Mulching too thickly can cause the bottom of the tree to develop fungus, which rots the trunk and causes the tree to decline as it ages. We also recommend de-mulching or removing the previous year’s mulch from the tree before re-mulching.
How to Dig the Right Planting Hole: Depth, Width & Root Room
Okay, so you’ve picked out your red maple and you’re ready to get it in the ground. Awesome! But before you just start digging, let’s talk about the hole itself. Getting this right is super important for the tree’s long-term health. You don’t want to cramp its style, or worse, cause root problems down the road.
The goal is to create a space where the roots can easily spread out and establish themselves. Think of it as giving your tree a good head start in its new home.
Depth: Not Too Deep, Not Too Shallow
Depth is key. You want the top of the root ball to be level with the existing ground. Planting too deep can suffocate the roots, and planting too shallow can leave them exposed. A good rule of thumb is to measure the height of the root ball and dig the hole to that depth. It’s better to err on the side of being slightly too shallow than too deep. The hole’s depth is important.
Width: Give Those Roots Some Room
Width is just as important as depth. You want to dig a hole that’s at least twice as wide as the root ball. This gives the roots plenty of room to spread out and explore the surrounding soil. Don’t be afraid to go even wider if you can. The wider the hole, the easier it will be for the roots to establish themselves.
Root Room: Loosening the Soil
Before you put the tree in the hole, take a few minutes to loosen the soil on the sides of the hole. This will make it easier for the roots to penetrate the surrounding soil. You can use a shovel or a garden fork to do this. Just break up the compacted soil a bit. This step is especially important if you have heavy clay soil.
Think of the planting hole as a welcome mat for your tree’s roots. You want to make it as inviting as possible so they’ll want to spread out and explore. A little extra effort in preparing the hole can make a big difference in the long run.
Checking for Drainage
Before you plant, it’s a good idea to check the drainage of the hole. Fill the hole with water and see how long it takes to drain. If it takes more than 24 hours, you may have a drainage problem. Red maples don’t like to sit in soggy soil, so you’ll need to address the drainage issue before planting. You can improve drainage by amending the soil with organic matter or by installing a drainage system.
Here’s a quick checklist:
- Measure the height of the root ball.
- Dig a hole that’s the same depth as the root ball.
- Dig a hole that’s at least twice as wide as the root ball.
- Loosen the soil on the sides of the hole.
- Check the drainage of the hole.
Follow these steps, and you’ll be well on your way to planting a healthy and happy red maple tree!
Planting Techniques: Positioning the Root Ball & Avoiding Common Mistakes
Okay, so you’ve dug your hole, prepped the soil, and you’re ready to get that red maple in the ground. This is where things get real. Getting the planting right is super important for the tree’s long-term health. Let’s talk about how to position the root ball correctly and dodge some common planting pitfalls.
First off, gently remove the tree from its container. If it’s root-bound (roots circling tightly around the inside of the pot), loosen them up a bit. You can gently tease them apart with your fingers or even make a few vertical cuts in the root ball with a knife. This encourages the roots to spread out into the surrounding soil instead of continuing to circle.
Now, for the main event: placing the root ball in the hole. The most important thing is to make sure the top of the root ball is level with or slightly above the surrounding ground. Planting too deep is a very common mistake and can lead to root rot and other problems. If you’re planting in an area with poor drainage, it’s better to err on the side of planting slightly high.
Once the root ball is in place, backfill the hole with the soil you removed earlier. Gently tamp down the soil as you go to eliminate air pockets. Air pockets can dry out the roots and prevent them from establishing properly. Water the newly planted tree thoroughly to help settle the soil and further eliminate air pockets. Consider using Root Booster for lifelong support at the roots.
Here’s a quick rundown of common mistakes to avoid:
- Planting too deep: As mentioned, this is a big one. Make sure the top of the root ball is level with or slightly above the surrounding ground.
- Not loosening root-bound roots: Circling roots can eventually girdle the tree, cutting off water and nutrients. Take the time to loosen them up.
- Leaving air pockets: Gently tamp down the soil as you backfill to eliminate air pockets.
- Piling mulch against the trunk: Mulch should be applied in a donut shape, leaving a few inches of space around the trunk. Piling mulch against the trunk can create a moist environment that encourages rot and pests.
- Forgetting to water: Newly planted trees need regular watering to establish their root systems. Water deeply and regularly, especially during dry spells.
Planting a tree isn’t just about sticking it in the ground. It’s about setting it up for a long and healthy life. Taking the time to do it right will pay off in the years to come.
After planting, consider staking the tree, especially in windy areas. Staking helps the tree establish its roots without being constantly rocked by the wind. Use soft ties to avoid damaging the trunk, and remove the stakes after about a year, once the tree is established. Also, remember that maple trees need room to spread to appreciate their beauty.
Watering a Newly Planted Red Maple: Frequency & Deep Soak Guidelines
Getting the watering right is super important when you first plant a red maple. Too much or too little water can really mess with its growth. You want to aim for a sweet spot that keeps the soil moist but not soggy. Think of it like Goldilocks and the three bears – not too much, not too little, but just right!
Initial Watering
Right after planting, give your red maple a good, deep watering. This helps settle the soil around the roots and gets the tree off to a good start. Make sure the water soaks in well. You might even want to water it, let it sit for a few minutes, and then water it again to saturate the area. Don’t forget to use a root booster for lifelong support at the roots.
Watering Frequency
How often you need to water depends on the weather and the type of soil you have. In general, for the first few months, water your new tree 2 to 3 times a week. As the tree gets more established, you can gradually reduce the watering frequency. Here’s a simple guide:
| Timeframe | Frequency | Notes |
| First 2-3 months | 2-3 times per week | Check soil moisture regularly. |
| Months 3-6 | 1-2 times per week | Adjust based on rainfall and soil dryness. |
| After 6 months | As needed | Monitor tree health and water during dry spells. |
Deep Soaking
Deep soaking is key to encouraging strong root growth. Instead of light, frequent watering, which only wets the surface, you want to water deeply and less often. This encourages the roots to grow deeper into the soil in search of moisture. A good way to do this is to use a soaker hose or let a regular hose trickle slowly near the base of the tree for an extended period. You can also use Treegator watering bags for a consistent water supply.
Checking Soil Moisture
Don’t just guess when it comes to watering. Get your hands dirty! Stick your finger a few inches into the soil near the base of the tree. If the soil feels dry to the touch, it’s time to water. If it feels moist, you can probably wait a day or two before watering again. This “finger test” is a simple but effective way to gauge your tree’s watering needs. Pay close attention to watering if you plant in summer.
Overwatering can be just as bad as underwatering. Soggy soil can lead to root rot, which can kill your tree. Make sure the soil is well-draining and avoid letting water pool around the base of the tree.
Seasonal Adjustments
Keep in mind that your watering schedule will need to change with the seasons. During the hot summer months, you’ll likely need to water more frequently than in the cooler spring or fall. Also, be aware of rainfall. If you’ve had a good soaking rain, you can probably skip watering for a few days. During the winter, reduce watering significantly, as the tree’s water needs are much lower during dormancy. Also, don’t forget to order the Nature Hills Root Booster for lifelong support at the roots.
Mulching
Applying a layer of mulch around the base of your red maple can help retain moisture in the soil and reduce the need for frequent watering. Aim for a 3-4 inch layer of mulch, but be sure to keep the mulch a few inches away from the trunk of the tree to prevent rot. Mulch not only enriches the soil as it breaks down, but arborist bark chips also insulate the roots from heat and cold while regulating soil moisture. Also, provide your new tree with trunk protection for the winter.
Mulching Around Red Maples: Benefits & Proper Application
Okay, so you’ve got your red maple in the ground. Awesome! Now, let’s talk mulch. It’s not just about making your yard look nice; it’s super important for the health of your tree. Think of it as a cozy blanket for the roots.
Why Mulch Matters
Mulch does a bunch of good stuff. It helps keep the soil moist, which is great, especially during those hot summer months. It also keeps weeds from popping up around the base of the tree, so you don’t have to spend all your time pulling them. Plus, as the mulch breaks down, it adds nutrients to the soil, which is like giving your tree a little snack. And, it protects the tree’s base from damage from lawnmowers and weed whackers. Seriously, mulch is a game-changer.
Choosing the Right Mulch
Not all mulch is created equal. You’ve got options like wood chips, shredded bark, pine straw, and even compost. For red maples, organic mulches are usually the way to go. They break down over time and enrich the soil. Avoid using rocks or gravel as mulch, as they don’t provide the same benefits and can heat the soil too much. I usually go with shredded hardwood bark; it looks good and does the job.
How to Apply Mulch the Right Way
Okay, here’s the deal: you don’t want to pile the mulch up against the trunk of the tree. That can cause rot and other problems. Instead, spread a layer of mulch about 2-4 inches thick around the base of the tree, making sure to leave a few inches of space between the mulch and the trunk. Think of it like a donut, not a volcano. And don’t forget to apply mulch in a wide circle, extending out as far as the tree’s drip line (the area directly beneath the outermost branches). This helps protect the roots and keeps the soil healthy.
I learned the hard way about piling mulch too high. I had this beautiful little maple, and I thought I was doing it a favor by giving it a big pile of mulch. Turns out, it was a recipe for disaster. The base of the tree started to rot, and I ended up having to remove a bunch of the mulch and treat the tree. Lesson learned: Less is more when it comes to mulching around trees.
Maintaining Your Mulch
Mulch breaks down over time, so you’ll need to replenish it every year or two. Just add a fresh layer on top of the old mulch, making sure not to pile it too high. Also, keep an eye out for weeds that might pop up through the mulch and pull them as soon as you see them. A little maintenance goes a long way in keeping your red maple happy and healthy. You can also use a starter fertilizer to help the tree grow.
Early Care & Maintenance: Pruning, Fertilizing & Protecting Seedlings
So, you’ve planted your red maple! Now what? The first year or two are super important for getting your tree off to a good start. Think of it like raising a kid – they need a little extra attention when they’re young. Here’s the lowdown on early care.
- Watering: Keep an eye on the soil moisture. Stick your finger a couple of inches into the ground. If it feels dry, give it a good soak. Don’t just sprinkle the surface; you want the water to reach the roots. Especially during hot summer months, you might need to water more often.
- Mulching: Keep that mulch ring around the base of the tree, but don’t let it touch the trunk. A few inches of mulch helps retain moisture, suppresses weeds, and keeps the soil temperature even.
- Protection: Young trees are vulnerable. Consider using tree guards to protect the trunk from rabbits, deer, and other critters. You might also need to stake the tree if it’s in a windy area to prevent it from toppling over.
It’s easy to get caught up in the excitement of planting and then forget about the tree. Set reminders on your phone or mark your calendar to check on your red maple regularly. A little bit of consistent care goes a long way in ensuring its long-term health.
Pruning is best done after the tree has leafed out. This helps avoid excessive sap loss. Remove any dead, damaged, or crossing branches. The goal is to encourage a strong, central leader and good air circulation. Don’t go overboard – light pruning is all that’s needed in the early years.
Fertilizing isn’t always necessary, especially if you amended the soil well at planting time. However, if your tree seems to be growing slowly or the leaves are pale, you can apply a balanced, slow-release fertilizer in the spring. Follow the package directions carefully to avoid over-fertilizing. A tree starter kit can be helpful.
Common Pests & Disease Threats to Newly Planted Red Maples
Okay, so you’ve got your red maple in the ground, and you’re feeling pretty good about it. But don’t get too comfy just yet! Young red maples, like any new plant, are vulnerable to a bunch of pests and diseases. Knowing what to look for can save your tree a lot of trouble down the road. It’s all about early detection and taking action before things get out of hand. Let’s take a look at some common issues.
Verticillium Wilt
This is a nasty fungal disease that can really mess with your red maple. It causes leaves to wilt, turn brown, and eventually drop off. It’s tricky because the symptoms can look like other problems, like drought stress. The fungus messes with the tree’s vascular system, making it hard for water and nutrients to get where they need to go. If you suspect verticillium wilt, it’s a good idea to get a soil test to confirm and figure out the best course of action. Pruning affected branches can help, but there’s no guaranteed cure.
Leaf Spot Diseases
Red maples can get a few different leaf spot diseases, like anthracnose and tar spot. Anthracnose can cause irregular spots on the leaves, while tar spot looks like, well, spots of tar. These diseases usually aren’t fatal, but they can weaken the tree, especially if it’s already stressed. Raking up and disposing of fallen leaves in the autumn can help prevent these diseases from coming back the next year. Also, make sure your tree has good air circulation to reduce humidity around the leaves.
Aphids
These tiny little bugs can be a real pain. They suck sap from the leaves, which can cause them to curl, turn yellow, and drop off. You might also notice a sticky substance called honeydew on the leaves, which can attract ants and other pests. A strong blast of water from the hose can often knock aphids off the tree. For more serious infestations, you might need to use insecticidal soap or neem oil. Keep an eye out for these pests, especially during the growing season.
Mapleworms and Cankerworms
These are types of caterpillars that can munch on the leaves of your red maple. They can cause significant defoliation if left unchecked. You might notice holes in the leaves or entire branches stripped bare. Here’s a quick rundown:
- Mapleworms: These guys are usually green with stripes and can grow to be a couple of inches long.
- Cankerworms: These are smaller and come in different colors, like green, brown, or black.
- Control: Bacillus thuringiensis (Bt) is an effective and organic way to control these pests. You can also handpick them off the tree if you don’t mind getting up close and personal.
Keeping your red maple healthy and vigorous is the best defense against pests and diseases. Make sure it gets enough water, sunlight, and nutrients. Regularly inspect the tree for any signs of trouble, and take action quickly if you spot something suspicious. A little bit of prevention can go a long way in keeping your red maple happy and healthy for years to come. Don’t forget to use Tree-tone fertilizer in the spring.
Weak Structure
Red maples are known for having a somewhat weak structure, which can make them prone to damage from wind and storms. This isn’t a pest or disease, but it’s worth mentioning because it can create openings for pests and diseases to get in. Regular pruning can help improve the tree’s structure and reduce the risk of breakage. Focus on removing dead, damaged, or crossing branches. Also, consider cabling or bracing weak branches to provide extra support. Proper cultivars of red maple trees can help with this issue.
How Red Maple Trees Grow: Expected Timeline & Growth Milestones
Okay, so you’ve planted your red maple. Now what? It’s not like it’s going to be a towering giant overnight. Let’s break down what you can expect as yourred maple grows.
Initial Growth (Years 1-3)
Those first few years are all about getting established. Don’t expect a huge growth spurt right away. The tree is focusing on developing a strong root system. You’ll likely see about 12-18 inches of growth per year during this time. Make sure you’re watering it well, especially during dry spells. Think of it as the foundation-building phase. Consistent watering and protection from pests are key during these early years.
Rapid Growth Phase (Years 4-15)
This is where things get exciting! Your red maple will start to take off. You can expect to see a more noticeable increase in height and spread. It’s still growing at that 12-18 inch pace, but it’s more visible now that the tree has a solid base. Keep an eye on the tree’s form and prune any crossing or rubbing branches to encourage good structure. This is also a good time to start thinking about long-term care, like mulching around red maples to retain moisture.
Maturing Tree (Years 15+)
Your red maple is now reaching its mature size. Growth will slow down a bit, but the tree will continue to fill out and become a beautiful shade tree. Red maples can reach between 40 and 60 feet tall, sometimes even taller. At this stage, focus on maintaining its health with regular inspections for pests or diseases. With proper care, your red maple can live for 80 to 100 years, providing beauty and shade for generations.
It’s important to remember that these are just general guidelines. The actual growth rate of your red maple will depend on several factors, including soil conditions, climate, and the specific variety of red maple you planted. So, be patient, pay attention to your tree’s needs, and enjoy watching it grow!
Here’s a rough idea of what to expect:
| Stage | Years | Expected Growth |
| Initial | 1-3 | 12-18 inches per year, root establishment |
| Rapid Growth | 4-15 | 12-18 inches per year, noticeable height increase |
| Maturing | 15+ | Slower growth, continued filling out |
Potential Issues and Considerations
- Soil Quality: Poor soil can stunt growth. Make sure your soil is well-drained and slightly acidic.
- Water Availability: Red maples need consistent moisture, especially when young.
- Pests and Diseases: Keep an eye out for common pests and diseases that can affect red maples.
- Sunlight: Ensure your tree is getting enough sunlight, at least 4-6 hours per day. Remember that red maples flourish in full sun.
Long-Term Care: Ensuring Healthy Red Maple Growth for Decades
So, you’ve planted your red maple, and it’s off to a good start. Now what? Long-term care is all about keeping your tree healthy and happy for years to come. It’s not a ton of work, but consistent attention makes a big difference. Think of it as regular check-ups for your leafy friend.
Regular Watering
Even after the first year, your red maple will appreciate consistent watering, especially during dry spells. Established trees are more drought-tolerant, but a good soak every couple of weeks during the summer heat can prevent stress. Keep an eye on the leaves; if they start to droop or turn brown at the edges, it’s a sign that your tree needs more water.
Fertilizing Schedule
Generally, red maples don’t need a lot of fertilizer, especially if they’re planted in decent soil. However, a yearly application of a balanced fertilizer in the spring can help promote healthy growth. I usually use Tree-tone fertilizer, because it’s organic and gentle. Soil tests are a good idea to see what your soil is lacking.
Pruning Practices
Pruning is important for maintaining the shape and health of your red maple. The best time to prune is late winter or early spring, before new growth begins. Remove any dead, damaged, or crossing branches. This improves air circulation and reduces the risk of disease. Here’s a quick guide:
- Young Trees: Focus on developing a strong central leader.
- Mature Trees: Remove deadwood and thin out the canopy as needed.
- Avoid Over-Pruning: Never remove more than 25% of the tree’s canopy in a single year.
Pest and Disease Management
Red maples can be susceptible to certain pests and diseases. Keep an eye out for signs of trouble, such as leaf spots, wilting, or unusual growths. Common pests include aphids and scale insects. Diseases like verticillium wilt can also be a problem. If you notice anything suspicious, it’s best to consult with a local arborist or Bio-Tone Starter Fertilizer specialist for advice.
Regular inspection is key. Catching problems early can prevent them from becoming serious. I check my trees every few weeks during the growing season, just to make sure everything looks okay. It’s a small effort that can save you a lot of headaches down the road.
Mulch Maintenance
Keep a layer of mulch around the base of your red maple to help retain moisture, suppress weeds, and regulate soil temperature. Replenish the mulch as needed, usually once a year in the spring. Make sure to keep the mulch a few inches away from the trunk to prevent rot. I like to use shredded bark mulch, but wood chips also work well.
Soil Care
Red maples prefer slightly acidic, well-drained soil. If your soil is alkaline, you can amend it with sulfur or peat moss to lower the pH. Regular soil testing can help you monitor the pH and nutrient levels. Good soil health is essential for long-term tree health. You can get soil testing done at your local garden center.
Want your red maple trees to stay strong and beautiful for many years? Our website has easy tips to help them grow well. Learn how to keep your trees healthy and happy. Visit us today to find out more!
Frequently Asked Questions
How quickly do red maple trees grow?
Red maple trees grow pretty fast, usually adding about 1 to 1.5 feet in height each year. They can reach their full size of 40 to 60 feet in about 25 years, providing shade quickly.
When is the best time to plant a red maple tree?
The best times to plant a red maple tree are in the spring or fall. These seasons have milder weather, which helps the tree settle into its new spot without too much stress from extreme heat or cold.
How much sunlight does a red maple tree need?
Red maples love sunny spots, meaning they need at least six hours of direct sunlight every day. They can also do well in partial sun, getting four to six hours daily.
What kind of soil is best for red maples?
Red maples prefer soil that drains well and is a little bit acidic. It’s also important for the soil to stay moist, so picking a naturally damp area is a good idea.
Are red maple trees hard to take care of?
Yes, red maples are quite simple to take care of. They don’t need a lot of special attention once they are established, making them a popular choice for yards.
Why should I use mulch around my red maple?
Mulch helps the soil around the tree hold onto moisture and keeps weeds away. It also adds good stuff to the soil as it breaks down. A layer about three inches thick around the base of the tree is usually enough.
Are red maple leaves red all year?
Red maple trees are known for their bright red leaves in the fall, but their twigs, flowers, and seeds can also have a reddish color throughout the year.
How big should the planting hole be for a red maple?
When planting, dig a hole that’s as deep as the tree’s root ball and about three feet wide. Make sure the top of the root ball is even with the ground.