How to Grow Black Walnut Seeds for Planting
- By Henry More
- October 13, 2025
Growing black walnut trees from seed is one of the most hands-on and affordable ways to add these impressive hardwoods to your landscape. For anyone interested in homegrown nut crops, long-term shade, or creating lasting value for future generations, starting with fresh seeds is both practical and rewarding. Personally, I find starting trees from seeds much more satisfying than buying established seedlings. There’s just something about watching a tree break through the soil, knowing I had a hand in its entire life from day one.
Introduction to black walnut seeds for planting

When you plant black walnut seeds, you’re dealing with nuts that need some attention before you see results. Here are a few facts to keep in mind:
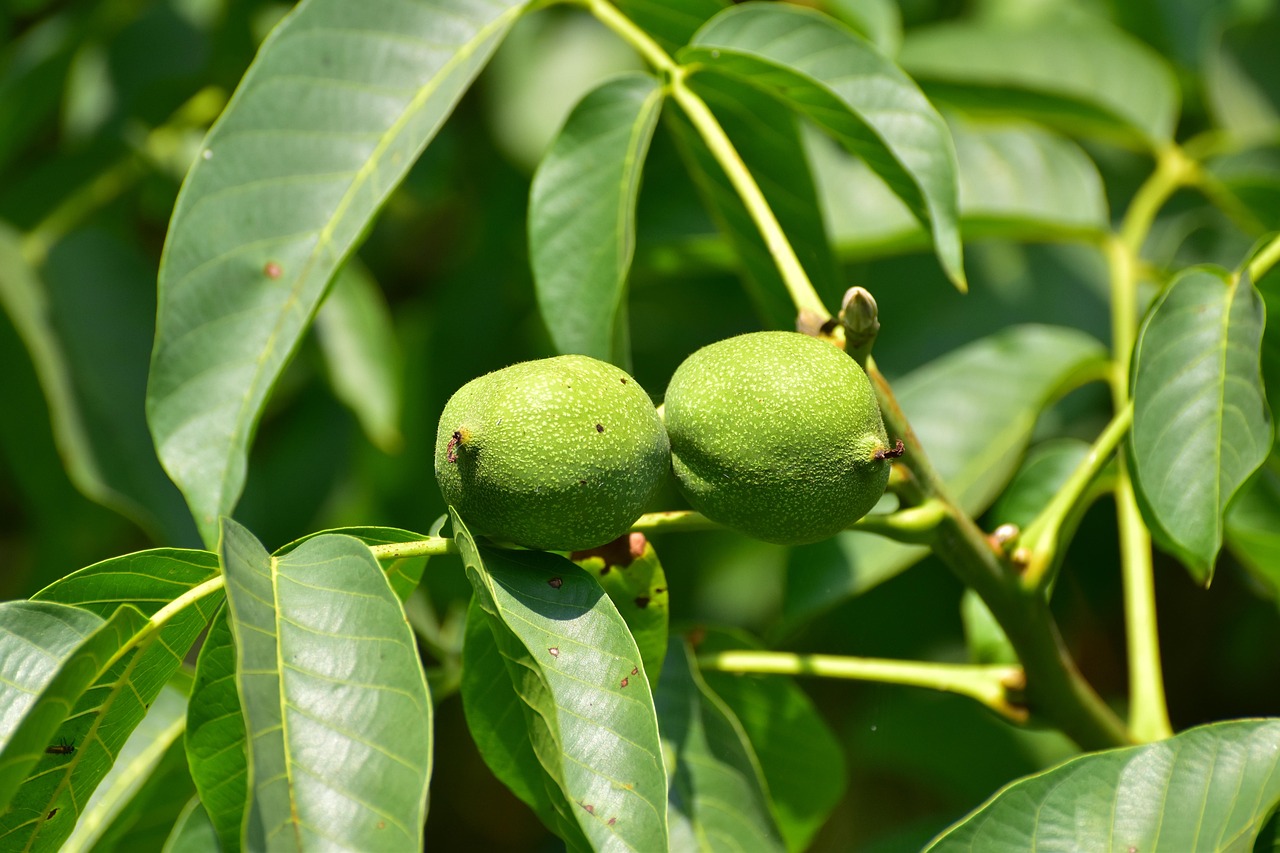
- Black walnut seeds (from the tree Juglans nigra) have a hard shell and a thick green husk that requires removal before planting.
- Seeds must go through a “cold period” before they will sprout. This mimics natural winter conditions.
- Not every seed will actually grow – some might look fine but are empty or old, so testing is a big step.
If you collect your own walnuts and do some prep work, you’ll almost always end up with more seedlings than you know what to do with—just be ready to share with friends (or make tough decisions about which ones to keep).
Black walnut trees grow tall and can live for decades, but getting them started begins with understanding their seeds’ quirks. I’ll walk through the steps from collection and preparation to testing and getting those first little trees off to a healthy start.
When & How to Collect black walnut seeds for planting
When I collect black walnut seeds for planting, timing is honestly everything. I wait until late September or early October, when the nuts begin dropping naturally to the ground—this is when they are fully ripe and most likely to sprout. If they’re picked from the tree early, I’ve found the seeds often aren’t mature.
Here are the basic steps I follow to collect black walnut seeds:
- Wait for the nuts to fall naturally; avoid picking them early.
- Wear gloves, because the husks stain like crazy.
- Gather twice as many nuts as the number of trees I want. Germination rates can be unpredictable.
If I want to be methodical, I’ll keep track of my harvest in a simple table:
| Collection Date | Number of Nuts Collected | Location |
| 9/28/2025 | 40 | Backyard, Lot Edge |
| 10/2/2025 | 27 | Stream Bank |
For best results, I always wait for the nuts to drop on their own. Rushing the process only makes more work later—and increases the chance of disappointment when the seedlings don’t show up months down the line.
Once I’ve got my harvest, I try to clean off the husks as soon as possible to make the rest of the process much easier.
Preparing & Cleaning black walnut seeds for planting

Getting black walnut seeds ready for planting is a process that takes some time, but it’s pretty satisfying if you’re into watching things grow from scratch. The way you clean and prep these seeds can make a big difference in whether they actually sprout.
Here’s how I go about it:
- Remove the husks: The nuts come encased in a tough, green husk you’ll want to get rid of right away. I usually wear gloves for this, since the husks can really stain your hands a yellow-brown. Sometimes, if I let the walnuts sit for a bit, the husks soften and are much easier to peel off.
- Clean the nuts: I toss the husked nuts into a bucket of water. I give them a good swirl and change the water a few times to get rid of dirt and the last bits of husk. This isn’t just about making them look good—it actually matters for storage and germination. If you’re following advice like using water to swirl and rinse the nuts, as described in placing them in a bucket filled with water, you’re on the right track.
- Sort the nuts: While they’re in the water, I check which ones float and which sink. Floating nuts get tossed—they rarely sprout. The keepers are the ones who sink to the bottom.
- Dry before storage: After that, I spread the cleaned nuts out to dry. Not in direct sun, just somewhere airy. Leaving them wet could lead to mold or early sprouting.
| Step | What to Do | Purpose |
| 1 | Remove husk | Stops staining, makes handling easier |
| 2 | Wash nuts | Removes debris, helps assess quality |
| 3 | Float test | Finds which seeds are likely to grow |
| 4 | Air dry | Prevents mold, preps for storage |
The cleaning step isn’t something I’d skip. Every time I’ve rushed it, I’ve noticed a drop in how many seeds actually sprout in spring. Just a few extra minutes here can really pay off later if you want strong trees growing from your seeds.
Testing the Viability Of Black Walnut Seeds For Planting
When it comes to planting black walnut seeds, I always want to be sure that the seeds I’m putting in the ground actually have a good shot at growing. Testing for seed viability is a quick but important step before I get started with planting or stratifying. Here’s how I go about it:
- I put the cleaned, husk-free black walnut seeds into a bucket of water and let them sit for about a minute.
- The seeds that float on the surface usually won’t grow, so I scoop them out and discard them.
- The seeds that sink to the bottom are the keepers and most likely to be alive inside.
- For even more certainty, I’ll crack open a few of the sinking seeds and check. Viable seeds have a firm, white kernel. If the kernel is shriveled, dark, or smells bad, that seed’s a goner.
Sometimes, I’ll want to know what percent of my seeds are actually any good. Here’s a simple table I use after cracking open a sample:
| Percentage Viable (sampled) | Seeds to Plant Per Hole |
| 80–100% | 2 |
| 60–80% | 3 |
| 40–60% | 4 |
| Less than 40% | 5 or more |
Even though this test is simple, it saves me a lot of work down the road. There’s nothing worse than putting in the effort to plant a bunch of seeds, only to have half of them do nothing months later.
With this float test, I know I’m only moving forward with seeds that have a real chance at sprouting.
Cold Stratification & Dormancy Treatment For Black Walnut Seeds For Planting
When it comes to black walnut seeds, they don’t just sprout if you plant them straight from the tree. They need a period of cold, moist storage—what gardeners call cold stratification—to break their dormancy and get them ready for spring. This whole process mimics what happens naturally outside over winter, but it’s pretty easy to do indoors if you want a head start or live somewhere warm.
Here’s how I usually go about it:
- First, I keep the cleaned, viable nuts in a slightly damp mixture of sand, peat moss, or vermiculite. I check the dampness. If I squeeze it, just a few drops should come out. Too wet, and they’ll rot; too dry, and nothing happens.
- Next, I put the nuts and that damp material in a resealable plastic bag or container. I store it in my fridge—aiming for about 34-41°F—for about 90 to 120 days.
- Every couple of weeks, I take a peek to make sure the mixture isn’t drying out or molding. If I spot any mold, I just wipe down the nut and replace the mix.
There’s something kind of satisfying about checking seeds all winter, seeing them change, and knowing nature is working even while everything outside looks dead. If you’re someone who likes a lower-maintenance route, you can simply sow the seeds outside in the fall and let natural cold stratification do the job for you.
Here’s a quick breakdown of the methods:
| Method | Where | Temperature | Duration |
| Outdoor Fall Sowing | In-ground | Varies | 3-4 months |
| Refrigerator Indoor | Indoors | 34-41°F | 3-4 months |
Cold stratification sounds fancy, but really, it’s just helping the walnuts experience a proper winter so they’ll sprout when spring rolls around. It’s the waiting (and not forgetting about them in the fridge) that usually gets me.
Site Selection & Soil Preparation For Black Walnut Seeds For Planting

Finding the right spot to plant black walnut seeds is something I don’t take lightly, especially if I want these trees to actually thrive. Black walnuts really prefer a deep, fertile site with good drainage and lots of sun. I look for a location that gets at least eight hours of sunlight a day—any less, and growth will be slow or stunted over the years. Soil is key: while they can manage in less-than-perfect dirt, the seeds do best in near-neutral or slightly acidic conditions, like what’s described in deep, fertile soil with a near-neutral or slightly acidic pH.
Here’s a quick list of what I check for before planting:
- Full sun exposure (8+ hours daily)
- Loose, well-draining soil
- Soil pH between 6.0 and 6.5
Dense clay or rocky patches slow things down a lot. If I can, I work up the soil to at least 18 inches deep and make sure water drains, so roots don’t get soggy. With walnuts, there’s no skipping the hard work upfront—removing sod, rocks, big roots, and breaking up any hard layers with a shovel makes all the difference in the long run.
I think about future space, too. These trees develop massive taproots and get big—spacing matters, especially if I’m planting several. Twenty to thirty feet between trees is pretty standard.
When I take the time to pick an open, sunny patch and put in the effort to prepare the soil, the seedlings reward me by growing faster and stronger, setting the stage for years of shade, nuts, and maybe even some hardwood lumber one day.
Planting Techniques & Depth For Black Walnut Seeds For Planting
When I get to the point of actually planting black walnut seeds, there are a handful of things I pay close attention to, like depth, spacing, soil texture, and especially protection from critters. Proper planting depth and attention to soil conditions set up black walnuts for healthy early growth.
I always try to select a spot with deep, moist, well-drained soil — this makes a big difference because black walnuts put down serious taproots, and you want those roots to have plenty of room to stretch out and grab nutrients. If you’re not sure about your soil, you can read more about the ideal situation for black walnut trees over at deep, well-drained, fertile soil.
Here’s how I typically go about the planting process:
- Dig a hole that is 2″ deep for each seed. If your soil is compacted, loosen it a bit wider than the nut itself.
- Place 1 to 3 viable seeds per spot, depending on your earlier viability test results (sinking in water usually means good viability).
- Cover the nuts gently with soil and firm it down so there aren’t air pockets, but don’t compact it too tightly.
- Protect the planted area from squirrels or other animals by placing hardware cloth or chicken wire over the spot. Anchor it with a rock or something heavy.
- If you’re planting rows, space the holes 12 to 18 feet apart. This feels far, but the trees get big and need plenty of sunlight and airflow.
Here’s a quick table for suggested planting depths and spacing:
| Seed Depth | Seeds per Hole | Row Spacing |
| 2 inches | 2-3 | 12-18 feet |
The trick, in my experience, is not to overthink things. If you set your seeds about 2 inches deep, in the right kind of ground, and protect them from hungry wildlife, you’re giving them the best possible start. After that, patience is your friend—germination comes in spring, once the soil warms up and the cold stratification is over.
Aftercare, Protection & Transplanting Black Walnut Seeds For Planting
Once my black walnut seeds have sprouted and small seedlings show up, it’s pretty tempting to think the hard part’s over. However, that’s where a bit more work comes in. After the seeds germinate, consistent care and smart protection can really make the difference between a strong crop of saplings and a patch of empty dirt.
Here’s how I usually manage this next part:
- I make sure the seedlings don’t dry out. Young walnuts need regular watering, especially during the first year, but I try not to overdo it and avoid soggy ground.
- Protection is huge. Squirrels and deer seem to have a radar for these young trees. I use wire mesh cages or plastic tree shelters, usually staked down, so critters can’t dig them up or snack on the new growth.
- Now and then, I check for weeds or grass crowding the base. I pull those up carefully (the roots of the seedling are delicate), so the walnut isn’t fighting for nutrients and water.
If I’m transplanting:
- I dig up the seedling on a cool, cloudy day to keep the root from drying out fast.
- I try to keep as much soil around the roots as I can—walnut taproots go deep real quick.
- The new hole goes at least twice as wide as the root ball, same depth as before, and in a sunny, well-drained spot. Many folks recommend 12-20 feet apart if I’m planning a small grove.
- After settling it in, I water thoroughly and fix up the protective cage again.
Here’s a simple table I put together that helps me remember when and how to do these steps:
| Step | When to Do It | Notes |
| Watering | Weekly, esp. first summer | Keep soil moist, not soggy |
| Weed Control | Monthly | Hand-pull near the seedlings |
| Protection | Immediately after planting | Wire mesh or tree shelter |
| Transplanting | Early spring or late fall | Dig wide, protect roots |
| Mulching | Spring & Autumn | Keep mulch clear of the trunk |
The truth is, watching over these seedlings isn’t complicated, but skipping these steps usually means hungry wildlife or dry spells wipe out a good chunk of them. Early attention and practical protection give me the best odds at a patch of healthy black walnut trees year after year.
I’ve found that reviewing a few established woody species basics can help if the walnuts just aren’t thriving. Adapting to your soil and local wildlife is half the game, so don’t get discouraged if you need to tweak your methods a bit each season.
Taking care of your black walnut seeds after planting is very important. Make sure they get enough water, protect them from animals, and move them to a bigger space if they start to outgrow their spot. If you want more advice or need help with your trees, visit our website today to get more tips and expert support on growing strong, healthy walnut trees.
Frequently Asked Questions
How do I know if my black walnut seeds are good for planting?
I check if my black walnut seeds are good by doing a float test. I put the seeds in a bucket of water. If the seed sinks, it is usually healthy and can grow. If it floats, I throw it away because it probably won’t sprout.
When is the best time to collect black walnut seeds?
I wait until late summer or early fall, when the walnuts start falling naturally from the tree. This means the seeds inside are fully grown and ready to be collected for planting.
Do I need to remove the husk before planting black walnut seeds?
Yes, I always remove the green or black husk before planting. The husk can damage the seed inside if left on. I use gloves because the husk can stain my hands and clothes.
Why do black walnut seeds need cold treatment before planting?
Black walnut seeds need a cold, damp period called cold stratification. This helps the seeds wake up from dormancy and get ready to sprout. I do this by planting them outside in the fall or by keeping them in the fridge in damp sand for 3 to 4 months.
How deep should I plant black walnut seeds?
I plant black walnut seeds about 2 inches deep in the soil. If I am planting more than one seed in the same spot, I space them out so they have room to grow.
How do I protect my black walnut seeds from animals?
I cover the spot where I plant the seeds with wire mesh or chicken wire. This keeps squirrels and other animals from digging up the seeds before they can grow into trees.