How to Grow a Black Walnut Tree from Seed Step-by-Step
- By Henry More
- August 11, 2025
I’ve always found it pretty interesting how much life can come from a single nut. Black walnut trees are no exception, and growing them from seed is a project I’ve taken on a few times. It takes a bit of patience, but seeing that first little sprout emerge in the spring is rewarding. If you’re looking to add one of these majestic trees to your yard, or just curious about the process, I’m going to walk you through exactly how I go about planting a black walnut tree from seed, from collecting the nuts to seeing them grow.
Key Takeaways
- Collecting walnuts directly from the tree in late summer or early fall, after they’ve naturally fallen, is best for embryo development.
- You can test the viability of your walnuts by seeing if they sink in water; sinking nuts are generally good to go.
- Black walnut seeds need a period of cold, moist conditions (stratification) to break their dormancy before they can sprout.
- When planting, bury the seeds about 1 to 2 inches deep in well-draining soil, ideally in a spot that gets full sun.
- Protecting your planted nuts and young seedlings from squirrels and other critters is important, as they often target these valuable seeds.
Understanding the Black Walnut Tree
When I first thought about growing a black walnut tree, I wasn’t sure where to start. It turns out these trees are pretty amazing, and growing them from seed is totally doable if you know a few things. They’re native to North America and are known for their hardwood, which is great for furniture, and of course, their tasty nuts. Plus, they can live for a really long time, sometimes over a hundred years. It’s pretty neat to think about planting something that could be around for generations.
Key Characteristics
Black walnut trees, or Juglans nigra, are pretty distinctive. They’re deciduous, meaning they lose their leaves in the fall. They can get quite large, often growing over 50 feet tall. The wood is strong and has a nice color, making it popular for woodworking. The nuts themselves have a rich, earthy flavor and are packed with good stuff like omega-3s.
- Deciduous trees
- Can reach heights over 50 feet
- Produce edible nuts
- Hardwood is valuable
Benefits of Growing Black Walnut
Beyond just having a nice tree in the yard, there are several benefits. The nuts are a good food source, and you can even use the husks to make a natural dye. The timber is also highly sought after. It’s a tree that offers both food and material value.
Uses for Walnut Trees
Walnut trees are used for a few main things:
- Nut Production: This is probably the most obvious. The nuts are delicious for you. They’re a great source of healthy fats and antioxidants.
- Lumber: The wood from black walnut trees is strong and attractive, used for making furniture, flooring, and even musical instruments.
- Dye: Believe it or not, the outer husk of the walnut can be used to create a natural brown dye.
It’s important to know that black walnut trees produce a substance called juglone. This chemical can stop other plants from growing well nearby, so you need to be careful where you plant them. I learned this the hard way when some of my other garden plants didn’t do so well near a young walnut tree. It’s best to give them their own space.
If you’re interested in the nutritional side of things, walnuts are quite a powerhouse. They’re rich in omega-3 fatty acids, which are good for your heart and brain. You can find out more about the health benefits of walnuts.
When to Harvest Seeds

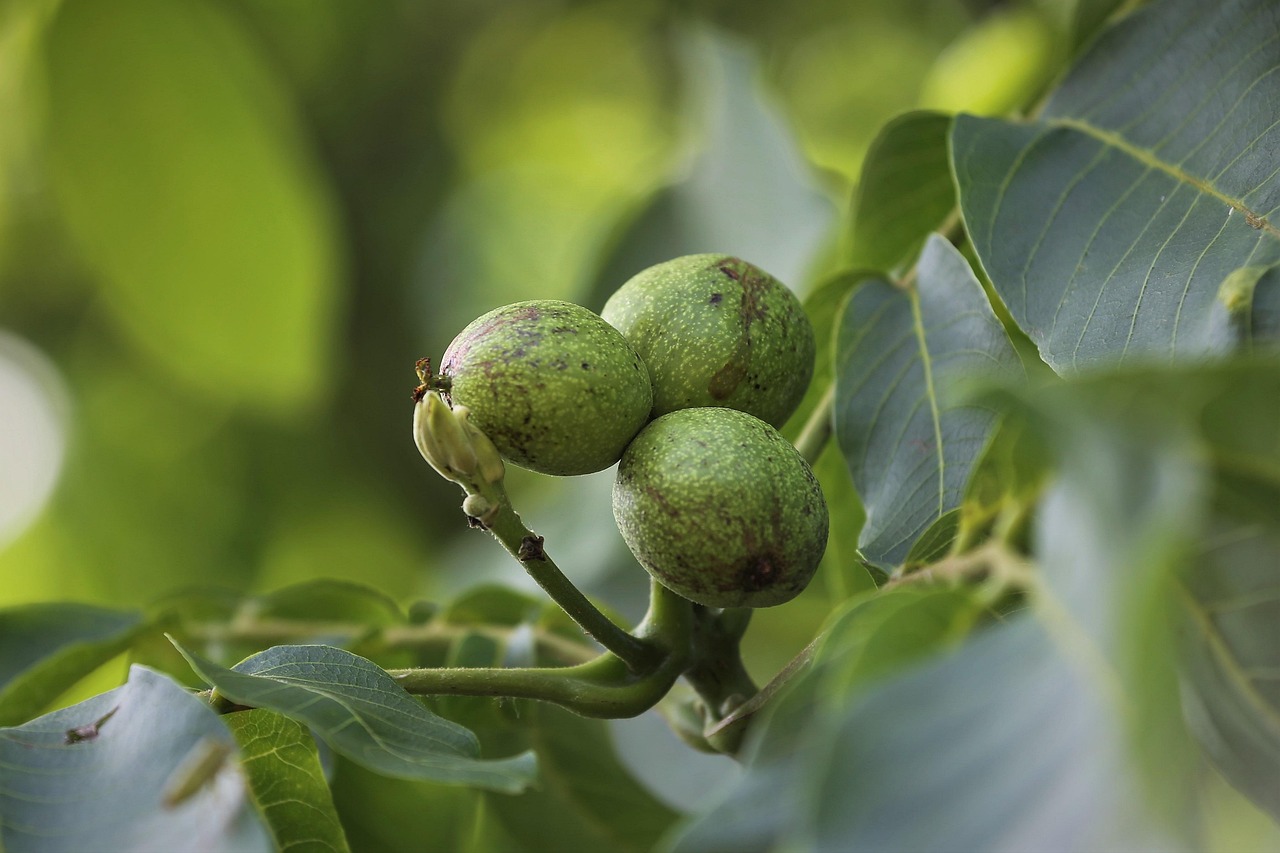
Timing is everything when it comes to collecting black walnut seeds for planting. You want to wait until the nuts are fully mature on the tree. The best time to harvest is in the fall, typically from late September through October, as the nuts naturally begin to drop. While you might see walnuts on the tree earlier in the summer, the embryo inside hasn’t developed properly yet. Patience is key here; letting them stay on the tree as long as possible ensures a better chance of viability. I usually start checking my trees in mid-September, but I don’t collect any until I see them falling on their own. It’s also a good idea to gather more seeds than you think you’ll need, as germination rates can vary. Aim for about twice the number of seeds as the number of trees you hope to grow.
Signs of Ripeness
- Outer Husk: The green outer husk should be tender. You can test this by pressing your thumb into it; a slight indentation indicates ripeness.
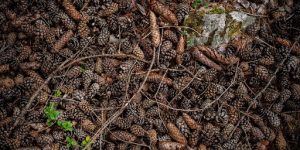
- Natural Dropping: The most reliable sign is when the walnuts begin to fall from the tree naturally. This means they have reached full maturity.
- Location on Tree: Walnuts higher up on the tree often ripen last. Shaking a few branches gently can help determine if the nuts are ready to detach.
Collection Tips
- Collect Promptly: Once the walnuts start falling, try to collect them from the ground fairly quickly. This helps prevent them from being taken by squirrels or other wildlife, and also keeps them from sitting in damp soil for too long.
- Wear Gloves: The green husk contains a natural dye that can stain your hands and skin a yellowish-brown. Wearing rubber gloves is a good idea during collection and hulling.
- Test Viability: Not all fallen nuts will be viable. A simple float test can help you sort out the good seeds from the bad ones. Learn more about the float test.
It’s tempting to grab walnuts as soon as you see them, but resisting that urge and waiting for them to fall naturally from the tree is really important for getting seeds that have a good chance of sprouting. I’ve learned that patience pays off when it comes to growing these trees.
Choosing High-Quality Seeds
After you’ve gathered your black walnuts, the next step is to figure out which ones are worth planting. Not every nut that falls from the tree is going to sprout. Some might have been damaged by insects, or maybe the embryo just didn’t develop properly. It’s a bit of a numbers game; I usually collect about twice as many nuts as I think I’ll need, just to be safe. A good germination rate can be anywhere from 40% to 90%, so having extras is smart.
The Float Test: A Simple Viability Check
This is where the float test comes in. It’s a straightforward way to sort out the duds from the potential trees. The idea behind it is pretty simple: if a nut has air pockets inside, it’s likely not viable. These air pockets can happen for a few reasons, like insect damage or if the embryo didn’t form right. The nuts that sink are generally the ones you want to keep.
Here’s how I do it:
- Get a bucket or a large bowl and fill it with water.
- Gently place your harvested walnuts into the water. Don’t just toss them in, as you don’t want to damage any potentially good nuts.
- Let them sit for about 60 seconds. You can even leave them for a bit longer, maybe 12 to 24 hours, to be extra sure.
- Watch what happens. The walnuts that sink to the bottom are considered viable. Any that float or stay suspended in the water are probably not going to sprout, so you can set those aside.
It’s important to remember that this test isn’t foolproof, but it’s a really good indicator. I’ve found it to be pretty reliable for giving me a good starting batch of seeds. It’s a simple step that can save you a lot of disappointment later on.
After you’ve done the float test, I usually give the viable nuts a quick rinse. If you’re not planting them right away, make sure to dry them off thoroughly. If you plan to store them for a bit before planting, keep them in a sealed container in the refrigerator. Leaving them out in the open air can dry them out, which kills the embryo inside. It’s a bit like how you might store American Sycamore seeds – keeping them cool and dry is key if you’re not planting immediately.
How to Safely Remove the Husk from Black Walnut Seeds
Once you’ve gathered your black walnuts, the next step is dealing with that tough outer husk. This green, leathery layer protects the nut, but it needs to come off before we can plant or properly store the seed. Getting this husk off can be a bit messy, so wearing gloves is a good idea to avoid staining your hands yellow or brown.
There are a few ways to tackle this. If you’ve collected walnuts that have been on the ground for a bit, the husk might have softened and started to turn black, making it easier to remove. If not, you’ll need a bit more effort.
Methods for Husk Removal
- Using a Knife: Place the walnut on a sturdy cutting board or a piece of scrap wood. Use a large, sharp knife (like a chef’s knife or a sturdy utility knife) to carefully slice into the husk. You’ll feel it when you hit the hard shell of the nut. Gently roll the nut forward while applying slight pressure against the shell. You can then twist the knife or pull the husk apart to reveal the nut. Always keep your other hand well away from the knife blade.
- Stomping (for larger batches): If you have a lot of walnuts, you can place them in a sturdy bag or container and carefully stomp on them. This can help break open the husks, but be mindful that it can also damage some of the nuts.
- Soaking and Scrubbing: Soaking the walnuts in water for a day or two can soften the husk considerably, making it easier to peel or scrub off. You might need to change the water a couple of times.
After removing the husk, it’s a good idea to rinse the nuts thoroughly. This helps remove any remaining husk material and the staining dye. Some people even soak them in water multiple times. This is also a good point to perform the float test to check for viability, which we’ll cover next. If you’re looking for more tips on tree care, you might find resources on growing mulberry trees helpful.
Be aware that the husk contains a natural dye called juglone. While it’s what gives the husk its color, it can also stain surfaces and skin. It’s best to work in an area that’s easy to clean and wear old clothes.
Once the husk is off and the nuts are rinsed, you’ll want to dry them properly before proceeding to the next steps, whether that’s stratification or direct sowing.
Preparing Seeds for Planting
After you’ve dealt with the husk and confirmed your black walnuts are viable with the float test, the next step is preparing them for planting. Black walnuts have a natural dormancy that prevents them from sprouting too early. To get around this, we need to mimic the conditions they’d experience over winter. This process is called cold stratification, and it’s pretty straightforward.
The Cold-Moist Stratification Process
Cold stratification essentially means giving the seeds a period of cold, moist conditions. This signals to the seed that it’s safe to start growing. I usually do this by gathering some damp sand or vermiculite. You want it moist, but not soaking wet – if you squeeze a handful, only a few drops of water should come out. Then, I mix the walnuts with this damp material in a sealed plastic bag or container. It’s important to use a container that seals well to keep the moisture in. After that, the bag or container goes into the refrigerator. I keep them there until it’s time to plant, usually in late winter or early spring. This method helps break the seed’s dormancy, making germination much more likely when the weather warms up. It’s a good idea to collect more nuts than you think you’ll need, as germination rates can vary. I aim for about twice as many trees as I want.
Black walnuts have a built-in mechanism to prevent them from sprouting right after they fall in autumn. If they did sprout, a sudden frost would likely kill the young seedling. By requiring a period of cold, the tree ensures that germination only happens when the danger of frost has passed. This natural process is what we’re replicating with cold stratification. Without this cold treatment, the seeds might just sit there, not knowing it’s time to grow. It’s like giving them a wake-up call at the right time of year. You can find more details on how to prepare your seeds by checking out resources on walnut tree stratification.
Storing Stratified Seeds
Once the seeds are in their moist medium inside a sealed container, they can be stored in the refrigerator. It’s important to check on them periodically, maybe once a month, to make sure the medium is still damp. If it seems dry, you can add a little more water. The goal is to keep them consistently moist but not waterlogged. This storage period is critical for breaking dormancy. I usually keep them in the fridge for about 90 to 120 days. After this period, they should be ready for planting outdoors, either directly in the ground or pots, depending on your plan.
Choosing Between Cold Stratification vs. Direct Sowing Outdoors
So, you’ve got your black walnut seeds, and you’re wondering about the best way to get them started. It comes down to two main paths: cold stratification or direct sowing outdoors. Both have their merits, and honestly, the choice often depends on your climate and how much patience you have.
Cold Stratification: The Controlled Approach
Cold stratification mimics winter conditions indoors. You’re giving the seeds a controlled period of cold, moist conditions to break their natural dormancy. I usually do this by mixing the cleaned nuts with damp sand or vermiculite in a plastic bag and popping it in the fridge for about three months. It’s a bit more hands-on, but it gives you a good idea of viability before spring even arrives. If you’re in a region with very mild winters or unpredictable cold spells, this method offers a bit more certainty. It’s like giving the seeds a head start in a cozy, controlled environment.
Direct Sowing Outdoors: Letting Nature Do the Work
Direct sowing, often called winter sowing, is simpler. You plant the seeds directly into the ground or pots outdoors in the fall. Mother Nature then takes over, providing the necessary cold and moisture through the winter. This is my preferred method when I can manage it, especially if I’m planting a lot of seeds. It feels more natural, and honestly, it saves me a step. The key here is to plant them deep enough, usually about 2-3 inches, and make sure to protect them from critters. Squirrels are notorious for digging up these treasures.
- Timing is Key: For direct sowing, aim for late fall, after the first frost but before the ground freezes solid. This gives the seeds time to settle in before winter hits.
- Protection is Paramount: Whether you stratify or sow directly, you’ll need to protect your seeds. Hardware cloth or chicken wire laid over the planting area is a good way to deter squirrels and other rodents. A heavy rock on top can help keep the wire in place.
- Planting Depth Matters: Regardless of the method, planting the seeds at the correct depth is important. Too shallow, and they might dry out or be easily dug up. Too deep, and they might struggle to emerge.
Ultimately, both methods aim to satisfy the black walnut’s need for a cold period to trigger germination. If you’re looking for a more hands-off approach and have a suitable climate, direct sowing in the fall is a great option. If you want more control or live in a warmer area, cold stratification is the way to go. I’ve had good luck with both, but direct sowing feels a bit more straightforward for me. It’s also worth noting that planting seeds directly where you want the tree to grow, if possible, avoids disturbing that long taproot later on, which is a big plus for growing pawpaws.
Planting Depth & Technique
When it comes to planting a black walnut tree from seed, getting the depth right is pretty important. I’ve found that a depth of about 1 to 2 inches is usually the sweet spot. Too shallow, and the little guy might dry out or get dug up by critters. Too deep, and it might struggle to push its way to the surface.
Planting Technique
When you’re planting black walnuts from seed, whether you’ve cold stratified them or are winter sowing, the process is fairly straightforward. I like to use containers that are at least 6 inches deep, though deeper ones, like 9 to 14 inches, are even better. This gives that taproot plenty of room to grow without getting all cramped.
Here’s a quick rundown of how I do it:
- Fill your chosen container with moist potting soil. Make sure it’s not soaking wet, just nicely damp.
- Place the stratified or winter-sown black walnut seed into the soil. Remember that 1-2 inch depth we talked about.
- Cover the seed with soil and gently firm it down.
- If you’re winter sowing, place the container outside in a spot that gets some morning sun but afternoon shade. An unheated shed or garage works, too. The key is to keep it cool, around 40°F, but it doesn’t need to freeze solid.
- Protect your planted seeds from squirrels and other hungry visitors; a piece of hardware cloth or a heavy rock on top can do the trick.
If you’re planting directly outdoors where the tree will eventually grow, which is often best to avoid disturbing that long taproot later on, you’ll want to dig a hole that’s a bit wider than the nut itself and about 2 to 3 inches deep. This gives the roots some space to spread out. I usually plant mine in late fall, around November or December, so they get that natural cold treatment from the soil and weather. It’s a good idea to plant more than you think you’ll need, as not all of them will sprout. You can find more information on growing trees like the tulip tree from seed here.
It’s really about mimicking nature as much as possible. Giving the seed the right conditions, a bit of protection, and letting it do its thing is the best approach for successfully planting black walnuts from seed.
Ideal Soil Conditions & Site Selection for Young Walnut Trees
When I’m thinking about where to plant my young black walnut trees, I always consider a few key things. These trees can get pretty big, and they have deep root systems, so giving them enough space from the start is a good idea. I’ve learned that picking the right spot early on saves a lot of trouble later.
Sunlight Needs
Black walnuts thrive in full sun. I try to find a location that gets at least eight hours of direct sunlight each day. If the spot gets less than six hours, the tree probably won’t do as well. It’s not worth the risk, in my opinion.
Soil Preferences
These trees aren’t too picky about soil, but they do best in soil that drains well. I avoid areas that tend to stay waterlogged. The soil should also be reasonably fertile. If I’m planting directly outdoors, I make sure to clear the area of any weeds, rocks, or other debris that might get in the way of the developing roots. It’s also a good idea to give them some space from other plants, as walnuts can affect nearby vegetation.
Spacing Considerations
Because black walnuts develop strong taproots, I never plant them in pots or try to move them around too much after they’ve started growing. When I plant seeds directly into the ground, I space them at least 12 feet apart. This gives them plenty of room to spread out as they mature. If I’m planning for nut production, I might even go as far as 20 feet between trees. It’s better to give them too much space than not enough.
I’ve found that planting the seeds in their final spot in late fall, around November or December, works well. This timing allows the natural cold stratification process to happen over winter, getting the seeds ready to sprout in the spring. It also means I don’t have to worry about moving delicate seedlings later on.
I always make sure to prepare the ground by removing any competing plants. This helps the young walnut saplings get all the resources they need without having to fight for them. It’s a simple step, but it makes a big difference in how well they establish themselves. For anyone looking to grow other types of trees, understanding their specific needs is just as important as with mulberry trees.
Protecting Seeds & Seedlings from Wildlife and Weather
Once your black walnut seeds have germinated or you’ve planted them directly, it’s time to think about keeping them safe. Young trees, and even the nuts before they sprout, can be quite appealing to local wildlife. Squirrels are notorious for digging up planted nuts, and deer can cause damage by rubbing their antlers on young saplings.
Protecting Seeds from Rodents and Squirrels
If you’ve planted your seeds directly into the ground, a simple yet effective method is to cover the planting area with a piece of hardware cloth or chicken wire. You can secure this with a rock or a brick. This barrier makes it difficult for squirrels and other small critters to get to the nuts. For seeds started in pots, placing a screen or even a heavy rock on top of the soil can deter digging. It’s better to be a bit overprotective at this stage than to lose your potential tree before it even gets going.
Shielding Seedlings from Larger Wildlife
As your seedlings grow, they become vulnerable to larger animals like deer. Deer can damage young trees by browsing on the leaves or rubbing their antlers on the bark, especially during the fall rutting season. To prevent this, consider using tree shelters or guards. These are typically plastic tubes or wire cages that fit around the sapling, providing a physical barrier. When selecting a shelter, make sure it’s tall enough to protect against antler rubbing and sturdy enough to stand on its own. You can find good options for tree protection that will help your saplings thrive.
Weather Considerations for Young Trees
Beyond animals, you’ll also want to think about the weather. While black walnuts are hardy, extreme conditions can still pose a threat to very young seedlings. Intense sun, strong winds, or heavy frost can stress a new plant. If you’re in an area with unpredictable spring weather, you might consider providing temporary shade during the hottest part of the day or a light cover if a hard frost is expected. This is especially important if your seedlings are in pots and can be moved to a more sheltered location.
Protecting your seeds and young seedlings is a vital step in the growing process. It requires a bit of foresight and some simple materials, but it significantly increases the chances of your black walnut tree reaching maturity.
Germination Expectations
After all the preparation and waiting, spring is when the magic happens. You can expect to see your black walnut seeds start to sprout, usually around mid-spring. This timing often coincides with when the overnight temperatures start to consistently warm up. It’s a pretty exciting moment, seeing that first little green shoot emerge from the soil.
What to Expect
Germination rates can vary, but I’ve generally seen about a 60% success rate in the first year. So, if you planted a good number of seeds, don’t be discouraged if not every single one sprouts. It’s a good idea to plant more seeds than you think you’ll need to account for this.
- Sprouting Time: Mid-spring, as temperatures rise.
- Germination Rate: Typically 40-90%, but plan for around 60% in the first year.
- Seedling Appearance: A small green shoot will emerge from the soil.
Post-Germination Care
Once you see sprouts, the young seedlings are still quite delicate. They need consistent moisture, but you don’t want to overwater them. If you planted them in containers, you might need to start thinking about where they’ll go long-term. Remember, these trees grow large, so proper spacing is important, with mature trees needing about 30 feet by 30 feet of space. If you’re planting for nut production, spacing them 12-20 feet apart is a good starting point.
Protecting your new seedlings from hungry critters like squirrels and deer is also important at this stage. They might still be interested in the nut itself, or the tender new growth.
Transplanting Saplings
Once your black walnut seedlings have developed a bit and are ready to move, it’s time to think about transplanting. This is a delicate process, and doing it at the right time and in the right way can make all the difference for your young tree’s future. I’ve found that the best window for transplanting is typically in the early spring, just as the ground is thawing but before the sap starts running and new leaves begin to unfurl. Late fall, after the leaves have dropped but before the ground freezes solid, is another good option. Avoid transplanting during the heat of summer or when the weather is extreme.
Preparing the New Location
Before you even think about digging up your seedling, get the new spot ready. You’ll want to dig a hole that’s about twice as wide as the seedling’s root ball and just as deep. This gives the roots plenty of room to spread out into the new soil. Make sure to loosen the soil at the bottom and sides of the hole to help the roots establish themselves more easily. Black walnuts prefer well-drained soil and a spot that gets full sun.
The Transplanting Process
When it’s time to move the seedling, be gentle. Water the seedling thoroughly in its current pot or location a day or two before transplanting. This helps the soil stay together around the roots. Carefully dig around the seedling, trying to keep as much of the root ball intact as possible. If it’s in a pot, you might need to gently tap the sides or even cut the pot away if the roots have become pot-bound. Once you have the seedling out, place it in the prepared hole. The top of the root ball should be level with the surrounding soil. Backfill the hole with the soil you removed, gently firming it around the roots to eliminate air pockets. Water the newly transplanted seedling well to help settle the soil.
Post-Transplant Care
After transplanting, consistent watering is key. Keep the soil consistently moist, but not waterlogged, especially during the first growing season. Mulching around the base of the tree, keeping it a few inches away from the trunk, can help retain moisture and suppress weeds. You’ll also want to continue protecting your young tree from pests and animals, as they can be quite vulnerable at this stage. I usually put a tree guard around them for the first year or two.
Transplanting is a bit like moving house for a plant; you want to make the transition as smooth and stress-free as possible. Giving it a good start in its new home will pay off as it grows.
Long-Term Care
Spacing Your Young Trees
Once your black walnut saplings are established, giving them enough room to grow is really important. These trees develop a pretty extensive root system, and they need space above ground, too. For nut production, I usually aim to space them about 12 to 20 feet apart. If you’re just growing them for shade or timber, you might get away with a bit more room, but it’s always better to give them too much space than not enough. Remember, they’ll eventually get quite large.
Managing Weeds Around Seedlings
Weeds are a real nuisance when you’re trying to get young trees going. They compete for water and nutrients, which is the last thing your little walnut trees need. I find that regular weeding is the best approach. Pulling them by hand is effective, especially when the soil is moist. Another trick I use is adding a layer of mulch around the base of the seedlings. This helps suppress weeds and also keeps the soil moisture more consistent. Just be careful not to pile the mulch right up against the trunk; leave a little breathing room.
Protecting Your Investment
Squirrels and deer can be a real headache for young trees. Squirrels have a knack for digging up newly planted nuts, even after they’ve started to sprout. Deer, on the other hand, might rub their antlers on the young bark, which can cause damage. To keep them safe, I’ve had good luck using plastic tree shelters or wire cages around the saplings. It might seem like a bit of extra work, but it pays off in the long run by protecting your trees as they establish themselves. It’s a good idea to check these protective measures periodically to make sure they’re still doing their job and not hindering the tree’s growth.
Ongoing Seedling Care
As your black walnut seedlings grow, keep an eye on their general health. Make sure they’re getting adequate water, especially during dry spells in their first couple of years. Mature trees are pretty drought-tolerant, but the young ones need consistent moisture. If you notice any signs of stress or disease, address it promptly. It’s also a good idea to keep the area around the trees clear of debris.
Taking care of young trees is a lot like raising a toddler; they need consistent attention and protection to grow into strong, healthy adults. Regular checks and prompt action can prevent small issues from becoming big problems.
I’ve found that consistent, gentle care in these early stages sets the foundation for a long-lived and productive tree. It’s rewarding to see them develop over the years, and knowing you gave them a good start makes it even better. If you’re interested in other trees that benefit wildlife, you might want to look into growing hackberry trees.
Taking care of your trees means knowing how to space them out, keep weeds away, and help young trees grow strong. These steps are super important for healthy trees. Want to learn more about keeping your trees in top shape? Visit our website for expert tips and services!
Frequently Asked Questions
When should I collect black walnuts for planting?
I usually start collecting black walnuts in late summer or early fall. The best time is when they naturally fall from the tree. This means the seed inside has had enough time to fully grow. It’s a good idea to gather more nuts than you think you’ll need, maybe twice as many, because not all of them will sprout.
How do I know if a black walnut seed is viable?
To check if a walnut is good for planting, I use the float test. I put the walnuts in water for about a minute. The ones that sink are usually good to go, while the ones that float might not be. For extra certainty, I sometimes leave them in the water for a whole day and only use the ones that stay at the bottom.
What’s the best way to remove the husk from a black walnut?
Removing the outer green husk can be a bit messy because it can stain your hands and clothes. I find that wearing gloves is a good idea. Sometimes, letting the husk sit for a bit makes it softer and easier to peel off. I’ve used a sturdy knife to carefully slice into the husk and then pry it open.
How do I prepare black walnut seeds for planting using cold stratification?
Black walnuts need a period of cold and moisture to wake them up before they can sprout. This is called cold stratification. I usually put the cleaned nuts in a plastic bag with damp sand or peat moss and store them in the refrigerator for about three to four months. This tricks them into thinking winter has passed.
Should I cold stratify my black walnuts indoors or plant them directly outside in the fall?
I have two main ways I like to plant them. One is to plant them directly outside in the fall, letting nature handle the cold period. I dig a hole about 2 to 3 inches deep and place the nut in it. Another way is to plant them in pots after they’ve been cold stratified in the fridge, again about 2 to 3 inches deep.
How deep should I plant black walnut seeds?
When I plant the seeds, I put them about 2 to 3 inches deep into the soil. It’s important not to plant them too shallow. I also make sure to give them enough space, planting them at least 12 feet apart if I’m putting them in their final spot.
When can I expect my black walnut seeds to sprout?
I’ve noticed that black walnut seeds usually start to sprout in the middle of spring. This happens when the weather starts to get warmer, especially overnight. It takes patience, but seeing that first little sprout is pretty exciting!
How can I protect my black walnut seeds and seedlings from animals?
Squirrels and deer can be a real nuisance! They often dig up newly planted nuts or even young seedlings. To protect them, I like to cover the planting spot with a piece of chicken wire or hardware cloth, weighing it down with a rock. For young trees, I sometimes use plastic tree shelters or cages.