How to Grow a Mulberry Tree from Seeds Easily
- By Henry More
- August 5, 2025
Growing your mulberry tree from seed might seem like a lot of work, but it’s pretty straightforward. You get to watch a tiny seed turn into a big tree, and the process itself is quite rewarding. Plus, you’ll end up with a tree that provides delicious fruit for years to come. This guide will walk you through how to grow a mulberry tree from seed, covering everything from picking the right seeds to caring for your new sapling.
Key Takeaways
- Mulberry seeds don’t typically need special treatment like cold stratification before planting.
- Seeds can be collected from ripe fruit and cleaned by washing them in water.
- Mulberry seedlings can grow quickly, sometimes reaching 1-3 feet in their first year.
- When growing from seed, the resulting tree’s fruit quality and sex are unknown until it matures.
- Mulberry trees are generally hardy and adaptable, tolerating various soil conditions and even less-than-ideal locations.
Why Grow a Mulberry Tree from Seeds: Benefits and Considerations
Thinking about how to grow a mulberry tree from seed? It’s a rewarding project, but it’s good to know what you’re getting into. Growing from seed offers a unique connection to the plant’s development, and it’s a fantastic way to increase the genetic diversity of these wonderful trees. Plus, you never know what unique traits your new tree might develop. It’s like a surprise waiting to happen!
Benefits of Growing from Seed
- Genetic Diversity: Seeds produce trees that are genetically different from the parent. This means you might discover a new favorite flavor or a particularly hardy specimen. It’s a way to contribute to the ongoing evolution of mulberry varieties.
- Cost-Effective: Starting from seed is generally much cheaper than buying a grafted or cutting-grown tree, especially if you plan on growing multiple plants.
- Discovery: You get the thrill of potentially growing a tree with exceptional fruit quality or other desirable characteristics that haven’t been seen before.
Considerations Before You Start
- Unknown Fruit Quality: The fruit from a seed-grown tree might not be as good as the parent tree’s fruit. It could be better, or it could be less desirable. You’re taking a bit of a gamble.
- Sex of the Tree: Mulberry trees can be male or female (dioecious). If you’re hoping for fruit, you need a female tree. Seedlings might take 5-10 years to mature enough to flower and reveal their sex, and you might end up with a male tree that never fruits.
- Time to Fruiting: Unlike grafted trees that can fruit within a couple of years, seed-grown trees have a longer juvenile period before they start producing fruit. Patience is a virtue here.
Growing mulberries from seed is a journey of discovery. While it requires more patience and offers less predictability regarding fruit quality and sex, the process itself is simple and can lead to unique and valuable additions to your garden or landscape. For those seeking immediate fruit production or specific known varieties, starting with a grafted mulberry tree might be a more direct route.
It’s important to understand these points before you commit to growing mulberries from seed. It’s a different experience from buying a mature, fruit-bearing tree, but one that many find incredibly fulfilling.
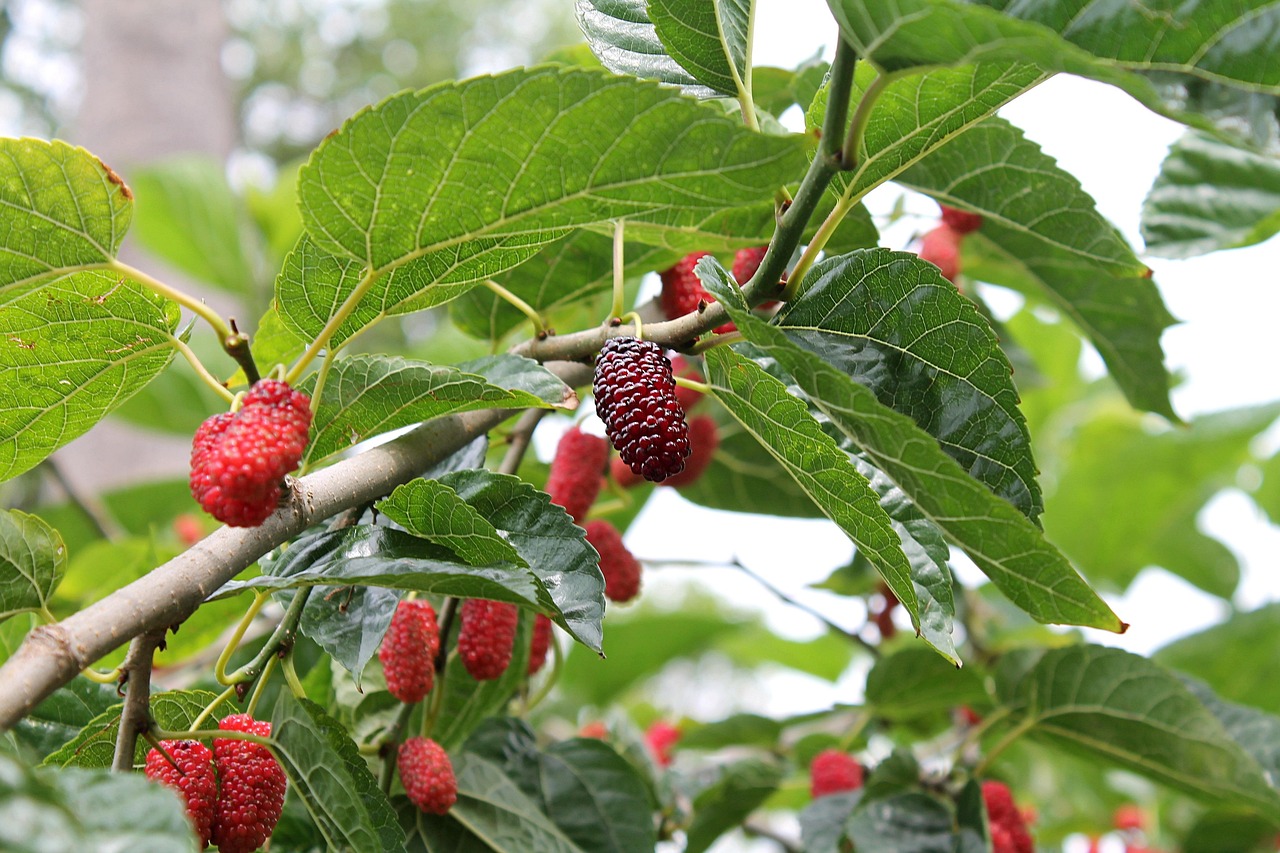
Selecting Healthy Mulberry Seeds: Best Practices for Seed Collection

When you decide to grow a mulberry tree from seeds, picking the right seeds is your first big step. It’s not just about grabbing any old berry; you want seeds from a healthy, productive parent tree. Think of it like picking out the best seeds for any garden project – quality in, quality out.
Source Matters: Choosing the Parent Tree
The tree you collect seeds from really makes a difference. If you have a mulberry tree that produces a lot of fruit, and especially if there are other mulberry trees nearby, the seeds are more likely to be viable. This is because cross-pollination often leads to better seed development. If a female tree has no male trees around, its seeds might not be fertile. So, look for a tree that’s already doing well and has neighbors.
Cleaning and Preparing Your Mulberry Seeds
Once you’ve got your berries, you need to get the seeds out. A simple way to do this is to mash the fruit in a bucket of water. You can use your hands or even a paint mixer on a low setting. Then, it’s a process of rinsing and repeating. Pour off the water, keeping the seeds at the bottom, add fresh water, stir, and pour off again. Keep doing this until all the fruit pulp floats away, leaving you with just the seeds. Let them dry out a bit before you plan to sow them.
Seed Viability Checklist
- Fruit Production: Collect from trees known for heavy fruiting.
- Proximity to Other Trees: Prioritize seeds from trees with nearby neighbors for better pollination.
- Seed Appearance: Look for plump, well-formed seeds; avoid shriveled or damaged ones.
- Freshness: While mulberries are forgiving, fresher seeds generally have higher germination rates.
Growing from seed means you’re introducing genetic variation. This is great for discovering new fruit flavors or finding a tree that’s particularly hardy in your area. However, it also means the resulting tree might not produce fruit exactly like its parent. If you’re aiming for a specific type of mulberry, like the Black Mulberry, you might consider grafting or cuttings instead.
Seed Stratification: Is Cold Treatment Necessary?
When you’re thinking about starting mulberry trees from seed, a common question that pops up is whether or not you need to do anything special to the seeds before planting, like giving them a cold treatment. This process is called stratification, and it mimics the natural conditions seeds might experience over winter.
For mulberry seeds, the consensus is that stratification is typically not necessary. Many growers have found that mulberry seeds germinate quite readily without any special pre-treatment. They often sprout within a couple of weeks when provided with the right conditions, like consistent moisture and warmth. Some sources even suggest that attempting to stratify them might not yield better results and could even be detrimental.
However, there’s always a bit of variation with seeds. If you’ve collected seeds from a particularly hardy or unusual variety, or if you’re unsure about their viability, a short period of cold, moist stratification might be worth trying. It’s a low-risk experiment that could potentially improve germination rates in some cases. If you do decide to stratify, a few weeks in the refrigerator, kept moist in a sealed bag with a bit of damp paper towel or sand, should suffice. Just remember to check them periodically to ensure they don’t dry out or develop mold. It’s also important to avoid any storage issues, like a server running out of space, which could affect your seeds if stored digitally, though that’s unlikely for seeds themselves.
When to Consider Stratification
- Uncertain Seed Viability: If you’re not sure how fresh or viable the seeds are.
- Specific Variety Needs: Some less common mulberry varieties might benefit from it.
- Experimental Approach: If you want to test different methods to see what works best for your specific seeds.
How to Stratify Mulberry Seeds (If You Choose To)
- Moisten Medium: Take a small amount of a sterile medium like peat moss, vermiculite, or even a damp paper towel. It should be moist, not soaking wet.
- Combine Seeds and Medium: Mix the mulberry seeds with the moist medium in a sealable plastic bag or container.
- Refrigerate: Place the bag or container in your refrigerator (around 35-41°F or 1-5°C) for about 2-4 weeks.
- Check Periodically: Open the container every few days to check for moisture and to ensure no mold is growing. If it seems dry, add a tiny bit more water. If mold appears, discard the affected seeds and medium and start again with fresh materials.
- Plant: After the stratification period, plant the seeds as you normally would.
Best Time to Sow Mulberry Seeds: Indoor vs. Outdoor Timing
Deciding when to sow your mulberry seeds is a key step for success. Generally, you have two main options: starting them indoors or sowing them directly outdoors. Each approach has its timing and advantages.
Indoor Sowing
Starting mulberry seeds indoors allows you to get a head start on the growing season, especially if you live in a region with a shorter warm period. The best time to start seeds indoors is typically 4-6 weeks before your last expected frost date. This gives the seedlings enough time to develop a strong root system and a few sets of true leaves before they are transplanted outside. This method provides a controlled environment, protecting young seedlings from harsh weather and pests during their most vulnerable stage. It’s a good way to ensure your seeds have the best chance to germinate and grow into healthy plants, giving you more control over the initial conditions.
Outdoor Sowing
For those in milder climates or who prefer a more natural approach, sowing seeds directly outdoors can be very effective. The ideal time for outdoor sowing is after all danger of frost has passed and the soil has warmed up. This usually falls in late spring or early summer, depending on your specific location. The soil temperature should consistently be above 60°F (15°C) for good germination. Sowing directly into the ground or a prepared outdoor bed mimics natural conditions and can lead to more robust plants, as they are not subjected to transplant shock. However, you will need to be more vigilant about protecting them from early-season pests and unpredictable weather.
Timing Considerations
- Spring Sowing: This is the most common time for both indoor and outdoor sowing. Starting indoors in early spring allows for transplanting after the last frost, while direct sowing in late spring takes advantage of warming soil.
- Fall Sowing: In some climates, sowing seeds in the fall can also be successful. The seeds will overwinter in the soil and naturally stratify, germinating the following spring. This method requires a bit more patience and a good understanding of your local climate to ensure the seeds survive the winter.
- Seed Viability: Remember that mulberry seeds can vary in their germination rates. Starting more seeds than you need, whether indoors or out, increases your chances of obtaining a good number of healthy seedlings. You can find more information on seed collection and preparation on our website.
When choosing between indoor and outdoor sowing, consider your local climate, the length of your growing season, and your personal preference for managing young plants. Both methods can yield successful results if done at the right time and with proper care.
Prepare Seed Starting Mix: Soil, Drainage, and Containers
When starting mulberry seeds, the right soil mix is key to healthy germination and early growth. You want a mix that drains well but also holds some moisture. A good starting point is a blend of potting soil, perlite, and compost.
Container Selection
Choosing the right containers is also important. Small pots, seed trays, or even recycled containers with drainage holes will work. Ensure whatever you choose has adequate drainage to prevent waterlogged soil, which can lead to root rot. For very young seedlings, shallow trays are often preferred as they allow for easy management of multiple plants. As the seedlings grow, you might need to move them to slightly larger pots.
Soil Mix Components
Here’s a breakdown of what makes a good seed-starting mix for mulberries:
- Potting Soil: Provides a base of nutrients and structure.
- Perlite or Vermiculite: Improves aeration and drainage, preventing the soil from becoming too compacted.
- Compost or Aged Manure: Adds organic matter and slow-release nutrients.
A common ratio is 2 parts potting soil, 1 part perlite, and 1 part compost. You can adjust this based on your specific conditions. Some growers also find success with a mix of peat moss and perlite, or even just a good quality seed-starting mix from a garden center. It’s important to use a sterile mix to avoid introducing diseases to your delicate seedlings. If you’re concerned about pests like slugs, which are known to enjoy young mulberry plants, you might consider adding a bit of coarse sand to the mix for added drainage and a less appealing texture for them. This can help prevent issues like the 507 Insufficient Storage error in your seed trays, metaphorically speaking, by creating a healthier environment for germination.
Starting seeds indoors gives you more control over the environment, which helps get those tiny mulberry seeds to sprout. A well-prepared mix means you won’t have to worry as much about the soil itself hindering their progress. It’s all about giving them the best possible start right from the beginning.
How to Sow Mulberry Seeds: Depth, Spacing, and Technique
Once you have your mulberry seeds ready, it’s time to get them into the soil. This step is pretty straightforward, but paying attention to a few details can make a big difference in how well your seeds sprout.
Seed Depth
When sowing, you want to give the seeds a little bit of protection but not bury them too deeply. A good rule of thumb is to plant them about 1/4 inch down. Too deep, and they might struggle to reach the surface. Too shallow, and they could dry out too quickly or be disturbed easily. You can use your finger or a small trowel to make a shallow furrow for the seeds.
Spacing
Mulberry seeds can germinate quite densely, and it’s common to have many seedlings pop up close together. If you’re sowing in trays or small pots, you can plant them fairly close, maybe an inch apart. This is because you’ll likely be transplanting them into individual pots or a larger bed once they get a bit bigger. If you’re sowing directly into a larger container or a prepared garden bed, give them a bit more room, perhaps 2-3 inches apart, to reduce competition early on. This spacing helps prevent the insufficient storage of nutrients and light for each young plant.
Sowing Technique
There are a couple of ways to go about this. One common method is to mix your seeds with a bit of sand. This helps distribute them more evenly and prevents them from clumping together. You can then sprinkle this mixture over your prepared seed-starting mix. After placing the seeds, gently cover them with the soil mix to the recommended depth. Another technique is to simply place seeds individually, especially if you’re aiming for specific spacing. After sowing, a gentle watering is important to settle the soil around the seeds. A spray bottle works well for this, as it won’t dislodge the tiny seeds. The goal is to provide consistent moisture without washing the seeds away.
It’s important to remember that mulberry seeds can be quite small, so handling them with care is key. Using a damp paper towel to pick them up can sometimes make it easier to place them accurately.
Germination Conditions: Temperature, Light & Water Needs
Once you’ve sown your mulberry seeds, providing the right germination conditions is key to getting them to sprout. Mulberry seeds generally don’t need anything too fancy, but a little attention to their environment can make a big difference.
Temperature
Mulberry seeds typically germinate best in warm conditions. Aim for a consistent soil temperature between 70-80°F (21-27°C). If you’re starting seeds indoors, a heat mat can be very helpful in maintaining this ideal range. Without consistent warmth, germination can be slow or even fail altogether. Too much fluctuation in temperature can also stress the seeds.
Light
When it comes to light, mulberry seeds don’t need it to start sprouting. It’s often best to keep them in the dark until you see the first signs of germination. Once seedlings emerge, they will need plenty of light. If you’re starting them indoors, place them under grow lights or in a very bright, sunny window. Insufficient light after germination can lead to weak, leggy seedlings.
Water Needs
Keeping the seed-starting mix consistently moist is important, but not waterlogged. The soil should feel like a wrung-out sponge. Overwatering can lead to fungal diseases like damping-off, which can kill young seedlings. Underwatering will dry out the seeds and prevent germination. A spray bottle is useful for gently watering the surface without disturbing the seeds or soil. You can also water from the bottom by placing the container in a tray of water, allowing the soil to soak up moisture from below. This method helps keep the surface drier, which can deter fungal growth. For successful seed starting, it’s helpful to understand tree seed germination techniques.
It’s a balancing act with watering. You want the soil to stay moist enough for the seeds to swell and sprout, but not so wet that it encourages mold or rot. Checking the soil moisture regularly and adjusting your watering schedule based on your specific environment is the best approach.
Caring for Seedlings: Watering, Lighting & Thinning Tips
Once your mulberry seeds have sprouted and you have tiny seedlings, it’s time to give them the right care. These little guys are delicate, so paying attention to their needs now will help them grow strong.
Watering
Keep the soil consistently moist, but not waterlogged. Think of it like a wrung-out sponge. Overwatering can lead to root rot, which is a quick way to lose your seedlings. On the flip side, letting them dry out completely will stress them and can stunt their growth. A gentle watering can or a spray bottle works best to avoid disturbing the young roots. Check the soil moisture by poking a finger about an inch down; if it feels dry, it’s time to water.
Lighting
Young mulberry seedlings need plenty of bright, indirect light. A sunny windowsill that doesn’t get harsh, direct afternoon sun is often ideal. If you don’t have a suitable window, grow lights can be a great option. Keep the lights about 4-6 inches above the seedlings, and aim for about 12-16 hours of light per day. Too much direct sun can scorch their tender leaves, while too little light will result in leggy, weak plants.
Thinning
If your seeds germinated very densely, you’ll likely have too many seedlings in one container. This competition for light, water, and nutrients will weaken them all. You’ll need to thin them out. You can do this by gently pulling out the weaker seedlings or by carefully snipping the weaker ones at the soil line with clean scissors. Leave the strongest seedlings spaced about 2-3 inches apart. This gives them room to grow without being overcrowded. It might feel a bit harsh, but it’s necessary for the health of the remaining plants. It’s a good idea to transplant some of the thinned seedlings into their small pots if you want to save more of them.
It’s important to handle mulberry seedlings with care. Their root systems are still developing and can be easily damaged. When watering or thinning, try to disturb the soil as little as possible. This gentle approach will help ensure they establish a strong foundation for future growth.
Transplanting Young Mulberry Plants: Timing and Techniques
Once your mulberry seedlings have grown a bit and are ready to move to a more permanent spot, it’s time to think about transplanting them. This is a pretty important step, and doing it right can make a big difference in how well your young trees establish themselves.
Timing is Everything
The best time to transplant your mulberry seedlings is typically in the spring or fall. You want to avoid transplanting when it’s hot or when the ground is frozen. Spring is often ideal because the soil is warming up, and there’s usually plenty of moisture, giving the roots a good chance to settle in before the summer heat arrives. Fall is also a good option, as the cooler temperatures and increased rainfall help the roots establish before winter dormancy. If you’re planting a container-grown mulberry tree, you’ll want to check the roots before you move it. It’s pretty common for these vigorous growers to have roots that are all wound up and tangled. Gently tease these roots apart with your fingers. This encourages them to grow outward into the new soil, rather than just continuing to circle.
Transplanting Techniques
When you’re ready to move your seedlings, whether they’re from pots or a seedbed, handle them with care. Try to disturb the root ball as little as possible. If you’re moving them from pots, gently slide the entire root ball out. If they’re in a seedbed, carefully dig around them, trying to keep as much soil attached to the roots as you can. Water them well right after planting, and keep up with watering until they seem to be well-established in their new location. This helps the soil settle around the roots and reduces transplant shock.
Transplanting is a delicate process. The goal is to minimize stress on the young plant, allowing its root system to adapt to the new environment without significant setbacks. Proper handling and consistent aftercare are key to a successful transition.
Selecting the Perfect Planting Site: Sunlight, Spacing & Soil
Once your mulberry seedlings are ready for their permanent home, picking the right spot is key. Mulberry trees are pretty adaptable, but they do have preferences that will help them thrive and produce the best fruit.
Sunlight Requirements
Mulberries love the sun. For the best growth and fruit production, aim for a location that gets at least six to eight hours of direct sunlight each day. More sun generally means more fruit. If you’re in a very hot climate, some afternoon shade might be beneficial to prevent scorching, but full sun is the general rule.
Spacing Considerations
These trees can get quite large, so giving them enough room to spread out is important. A mature mulberry tree can easily reach 20-30 feet in height and width, depending on the variety. When planting, give them plenty of space from other trees, buildings, or fences. A good rule of thumb is to plant them at least 20-30 feet away from any structures or other large plants. This allows for air circulation, which helps prevent diseases, and gives the roots room to grow without competition. If you’re planting multiple mulberries, space them accordingly.
Soil Preferences
Mulberry trees aren’t overly fussy about soil type, but they do best in well-draining soil. They can tolerate a range of soil pH levels, from slightly acidic to slightly alkaline. If your soil tends to stay wet after rain, consider amending it with compost or other organic matter to improve drainage. You can also plant them on a slight mound to help water run off. Good soil health supports a strong root system, which is vital for the tree’s overall health. You can check out some gardening resources for tips on soil improvement.
While mulberries are known for their hardiness, avoiding waterlogged areas is one of the most important factors for long-term success. Soggy roots can lead to rot and other problems that can stunt or even kill the tree.
Mulberry Seedling Planting Steps: How to Plant in the Ground
Once your mulberry seedlings have developed a few sets of true leaves and are sturdy enough, it’s time to move them to their permanent home in the ground. This step is exciting because it means your little trees are getting ready for serious growth. Planting them correctly now will set them up for a healthy life.
Preparing the Planting Hole
Before you even think about digging, pick the right spot. Mulberry trees need full sun, so find a location that gets at least six to eight hours of direct sunlight daily. Also, make sure there’s enough space for the tree to grow, both above and below ground. Dig a hole that’s about twice as wide as the seedling’s root ball and just as deep. This gives the roots plenty of room to spread out into the surrounding soil.
Gently Removing Seedlings from Containers
When it’s time to transplant, be gentle. If your seedlings are in pots, carefully tip the pot on its side and slide the plant out. Try not to pull on the stem. If the roots are tightly wound, which is common with vigorous growers like mulberries, gently tease them apart with your fingers. This helps encourage outward growth and prevents the roots from circling endlessly. You can find more on preparing roots for planting atMulberry Tree Care.
Planting the Seedling
Place the seedling in the center of the hole. The top of the root ball should be level with the surrounding soil surface. It’s really important that you don’t plant it too deep. Once it’s positioned correctly, start backfilling the hole with the soil you removed. You can mix in some compost if your soil isn’t very rich, but usually, the native soil is fine. Gently firm the soil around the roots to remove air pockets, but don’t pack it down too hard.
Watering and Mulching
After planting, give the young tree a good, deep watering. This helps settle the soil around the roots and reduces transplant shock. Then, add a layer of mulch, like wood chips or straw, around the base of the tree. Keep the mulch a few inches away from the trunk itself to prevent rot. Mulch helps retain moisture, suppress weeds, and regulate soil temperature, giving your new mulberry tree the best possible start.
Ongoing Mulberry Tree Care: Watering, Pruning & Fertilizing Tips
Once your mulberry tree is established, it’s pretty good at taking care of itself. But a little attention can go a long way, especially in the early years. Think of it as giving your tree a good start so it can be generous for years to come.
Watering Needs
Young mulberry trees, especially those in their first year, need consistent moisture. Aim for deep watering about once a week, making sure the soil stays moist but not waterlogged. As the tree matures and its root system expands, it becomes much more drought-tolerant. Established trees can often get by on natural rainfall, though a good watering during extended dry spells is always beneficial. Remember, mulberries don’t like standing water, so pick a spot with good drainage.
Pruning Strategies
While mulberries are tough and can grow without much pruning, if you want the best fruit for yourself, a bit of shaping is a good idea. Many people prune to create an ‘umbrella’ shape, which makes harvesting easier. This involves training the main branches to grow outwards and upwards, keeping the lower branches not too low, maybe just over a meter off the ground. This shape helps you reach all the fruit.
- Formative Pruning: Focus on creating a strong, permanent branch structure in the early years.
- Annual Pruning: After the tree is shaped, prune back most of the new growth each year, leaving just a couple of buds. This might sound harsh, but fruit forms on new growth, so it doesn’t hurt the fruit production. Don’t be afraid; mulberries are hard to kill!
- Timing: The best time to prune is in late winter when the tree is dormant.
Fertilizing and Soil Care
Mulberry trees aren’t picky eaters. They have extensive root systems that help them find nutrients. However, you can give them a boost by adding compost around the base of the tree. This mulch helps feed the soil, keeps weeds down, and retains moisture. Generally, mulberries don’t need heavy fertilization, especially if they are planted in decent soil. They are known to grow well even in less-than-ideal conditions, sometimes popping up in pavement cracks! Just avoid planting them where they’ll be sitting in water. If you’re looking for a hardy fruit tree, the Black Mulberry is a solid choice.
Keeping your mulberry tree healthy involves regular care. This means giving it the right amount of water, trimming it back when needed, and providing the right food. Proper care helps your tree grow strong and produce lots of fruit. For more detailed advice on how to keep your mulberry tree thriving, check out our expert tips on our website!
Frequently Asked Questions
Do mulberry seeds need to be chilled before planting?
Mulberry seeds don’t usually need any special cold treatment before planting. They often sprout up within a couple of weeks when given the right conditions, like warmth and moisture.
When is the best time to plant mulberry seeds?
It’s best to plant mulberry seeds in the spring. You can start them indoors a few weeks before the last frost or sow them directly outside once the weather is warm and the danger of frost has passed.
What kind of soil should I use for starting mulberry seeds?
Mulberry seeds need a well-draining soil mix. A good combination is equal parts potting soil, compost, and sand or perlite. Make sure the containers have drainage holes.
How deep should I plant mulberry seeds?
Plant the seeds about 1/4 inch deep in the soil. Space them about an inch apart if you’re sowing them in a tray or pot, or a few inches apart if planting directly in the ground.
What are the best conditions for mulberry seeds to sprout?
Keep the soil consistently moist but not soggy. Mulberry seeds need warmth, ideally around 70-75°F (21-24°C), and bright, indirect light to germinate.
When can I move my mulberry seedlings to a bigger pot or the ground?
Once your mulberry seedlings have a few sets of true leaves and are sturdy enough, you can carefully transplant them. It’s best to do this in the spring or early fall, after hardening them off to outdoor conditions.
Where is the best place to plant a mulberry tree?
Choose a spot that gets full sun. Mulberry trees also need plenty of space to grow, so make sure to plant them at least 20-30 feet away from other trees or structures. They prefer rich, well-drained soil.
How do I take care of a young mulberry tree?
Young mulberry trees need regular watering until they are established. You can also feed them with a balanced fertilizer in the spring. Pruning is important to shape the tree and encourage fruit production, usually done in late winter.