How to Grow American Sycamore from Seed Step-by-Step
- By Henry More
- June 30, 2025
Want to grow your own American Sycamore tree from scratch? It’s a pretty cool project, and not as hard as you might think. These trees get really big and offer great shade, plus they look awesome with their unique bark. This guide will walk you through everything you need to know, step-by-step, to successfully grow American Sycamore from seed. Let’s get started!
Key Takeaways
- American Sycamore seeds need a cold period before they’ll sprout. This is called stratification.
- Collect seeds in late fall or early winter, usually after the first hard frost.
- Plant seeds shallowly, about 1/8 inch deep, in a good potting mix.
- Keep the soil consistently moist but not soaking wet for best results.
- Young sycamore trees grow fast and need plenty of light and space as they get bigger.
Growing American Sycamore from Seed
So, you want to grow an American sycamore from seed? It’s a cool project! Sycamores are awesome trees, known for their size and unique bark. Growing them from seed lets you see the whole process, from tiny seed to a big tree. It takes some patience, but it’s worth it. Let’s get into the steps.
Starting from seed is a great way to cultivate these majestic trees and witness their entire life cycle.
First, you’ll need to gather your seeds. Then, you’ll prep them, get them to sprout, and eventually plant them. It’s not rocket science, but there are some tricks to know to increase your chances of success. One thing to consider is the uses of sycamore seed. They’re not just for growing new trees; some folks use them in crafts or even as a food source for certain animals. Just make sure you know what you’re doing before you try anything like that.
Growing sycamores from seed is a rewarding experience. It allows you to connect with nature and contribute to the environment. Plus, you get a cool tree out of it.
Why Choose American Sycamore (Platanus occidentalis)? Benefits & Features
American sycamore trees, with their distinctive bark and broad canopies, are more than just visually appealing. They offer a range of benefits that make them a worthwhile choice for planting, provided you have the space. Let’s explore some reasons why you might want to consider growing an American sycamore.
- Fast Growth: Sycamores are known for their rapid growth rate, quickly providing shade and visual impact.
- Wildlife Habitat: They support a diverse range of wildlife, offering food and shelter for birds, insects, and mammals.
- Unique Aesthetic: The mottled bark, with its patches of brown, green, and white, provides year-round visual interest.
Sycamores are pretty adaptable, tolerating different soil types and conditions. However, they do best in moist, well-drained soil and plenty of sunlight. Keep in mind their mature size when selecting a planting location, as they can become quite large.
One of the most significant benefits of sycamore trees is their environmental contribution. Their extensive root systems help to prevent soil erosion, and their large canopies provide ample shade, reducing the urban heat island effect. Plus, they’re just beautiful trees to have around. If you’re looking for a tree that offers both aesthetic appeal and practical benefits, the American sycamore is worth considering. Growing them from seed is a rewarding experience, allowing you to witness the entire life cycle of this majestic tree. Just remember to collect seeds in the late summer or early fall.
When and Where to Collect Sycamore Seeds: Timing & Tips

Okay, so you’re ready to gather some sycamore seeds. Timing is actually pretty important, and knowing where to look can save you a ton of effort. Let’s get into the nitty-gritty.
Generally, the best time to collect sycamore seeds is from September through November. The seeds mature during this period, but they often stay on the tree well into winter and even early spring. This makes sycamore one of the last fall-maturing species you can collect in the Eastern forest. If you’re dealing with a California sycamore, remember that they mature much earlier, so aim for fall collections.
Collecting seeds can be a fun activity, but always be mindful of your surroundings. Avoid trespassing on private property, and be aware of any potential hazards like falling branches or slippery surfaces, especially if you’re collecting after rainfall or snowfall.
Timing Your Collection
Keep an eye on the fruiting heads, those ball-shaped clusters that hold the seeds. You want to grab them just before they start to break apart and release their hairy seeds. Once the seeds ripen, they’re ready to go, but the tree holds onto them for a while. Waiting until after the leaves have fallen can make spotting the seed heads easier, as they’ll be more visible against the bare branches.
Where to Look
- Directly on the Tree: The easiest way is often to pick the fruiting heads directly from the tree. Look for branches within reach or use a pole pruner if needed. Be careful when reaching for higher branches.
- Under the Tree: Check the ground beneath mature sycamore trees. You might find seed heads that have already fallen. These can still be viable, but make sure they haven’t been sitting there for too long or gotten too wet and moldy.
- Nearby Areas: Wind dispersal means seeds can travel a bit. Check nearby areas, especially after windy days, for scattered seed heads.
Tips for Successful Collection
- Wear Gloves: The hairy tufts on the seeds can be irritating to some people’s skin, so wearing gloves is a good idea.
- Use a Bag or Container: Have a bag or container ready to collect the seed heads as you pick them. This will keep them from scattering and make them easier to transport.
- Collect from Multiple Trees: To ensure genetic diversity, try to collect seeds from several different trees in the area.
How to Extract and Clean Sycamore Seeds Safely
Okay, so you’ve got your sycamore seed heads. Now what? Getting those tiny seeds out and ready for planting takes a little effort, but it’s not too hard. The goal is to separate the seeds from the fluff and debris without damaging them. Let’s get into it.
Separating Seeds from the Seed Head
The best time to collect the seed heads is in the late fall or early winter, just as they start to break apart naturally. You can pick them directly from the tree or gather them from the ground. Once you have your seed heads, here’s how to get the seeds out:
- Drying: Let the seed heads dry out completely. This makes them easier to break apart. You can spread them out on a tray in a warm, dry place for a week or two.
- Crushing: Once dry, gently crush the seed heads. You can do this by hand, wearing gloves to avoid irritation from the fuzzy material. For larger quantities, try rubbing the seed heads against a screen or hardware cloth with a mesh size that allows the seeds to fall through but retains the larger debris.
- Winnowing: This is the process of separating the seeds from the chaff (the lightweight debris). You can do this outside on a breezy day. Gently pour the crushed seed head mixture from one container to another, allowing the wind to carry away the lighter particles. A fan can also work for this.
It’s important to wear a dust mask during this process, especially if you’re working with a large batch of seeds. The fine hairs and dust from the seed heads can be a respiratory irritant.
Cleaning the Seeds
After separating the seeds, you’ll still have some debris mixed in. Here’s how to clean them up:
- Screening: Use a series of screens with different mesh sizes to sift out larger debris like twigs and leaves. A kitchen sieve can work in a pinch.
- Hand Picking: For the remaining debris, you might need to pick it out by hand. This is tedious but ensures you have a clean batch of seeds.
Important Considerations
- Safety First: Always wear gloves and a dust mask when handling sycamore seed heads. The fine hairs can cause skin and respiratory irritation.
- Seed Viability: Not all seeds are viable. A good way to test viability is to do a water test. Place a sample of seeds in a bowl of water. Viable seeds will sink, while non-viable seeds will float. Discard the floaters.
- Seed Size: Sycamore seeds are tiny, so be careful not to lose them during the extraction and cleaning process.
And a question I get asked a lot is, “Can you eat sycamore seeds?” The answer is generally no. While there might not be extensive data on their toxicity, it’s best to avoid consuming them. Focus on propagating them to grow beautiful trees instead.
By following these steps, you’ll have a clean batch of sycamore seeds ready for stratification and planting. Good luck!
Seed Storage Tips: Cold Storage vs Room Temperature
Okay, so you’ve collected your sycamore seeds and cleaned them up. Now what? How you store them is pretty important for long-term viability. You don’t want to go through all that effort just to have them not sprout when you’re ready to plant.
The key is keeping them cool and dry.
Here’s a breakdown of your storage options:
- Cold Storage (Refrigeration): This is generally the preferred method for long-term storage. Think of it like hitting the pause button on their life cycle. The goal is to mimic winter conditions, which helps preserve the seeds until you’re ready to trick them into thinking it’s spring.
- Room Temperature: This can work for short-term storage, but it’s riskier. Fluctuations in temperature and humidity can reduce the seed’s viability. If you go this route, make sure the seeds are in a cool, dark, and dry place.
- Moisture-proof containers: Regardless of the temperature, you must store the dried seeds in moisture-proof containers, such as polyethylene bags.
Proper seed storage is often overlooked, but it’s a critical step in ensuring successful germination. Taking the time to store your sycamore seeds correctly will significantly increase your chances of growing healthy trees.
Let’s get into some more specifics:
- For cold storage, aim for temperatures between 32°F and 45°F (0°C and 7°C). Your refrigerator is perfect. Just don’t put them in the freezer.
- Make sure your seeds are dry before storing them. Excess moisture can lead to mold and ruin your entire batch.
- Use airtight containers to prevent moisture from getting in. Ziplock bags or sealed plastic containers work well.
- Label everything. Include the date of collection and any other relevant information. Trust me, you’ll thank yourself later.
If you’re unsure about the viability of your stored seeds, you can always do a quick germination test before planting. Just place a few seeds on a damp paper towel, seal them in a plastic bag, and wait a week or two. If they sprout, you know your seeds are still good to go. If not, it might be time to collect a fresh batch. You can easily test the germination rate on wet paper or sand, or in shallow dishes of water at a temperature of around 80°F over 14 days.
Do American Sycamore Seeds Need Stratification?
So, you’re wondering if you need to stratify sycamore seeds before planting? Let’s get straight to the point. The good news is that American sycamore seeds are pretty easygoing. They generally don’t require a stratification period to germinate effectively. This is a big plus, saving you time and effort compared to other tree species.
However, there’s a little nuance to consider. While not strictly required, some sources suggest that a period of moist, cold stratification can potentially improve germination rates, especially for certain sycamore varieties like the California sycamore. But for the standard American sycamore (Platanus occidentalis), you can usually skip this step and still achieve satisfactory results.
Think of it this way: stratification is like giving the seeds a head start, mimicking winter conditions to break dormancy. But American sycamore seeds are often ready to go without this extra nudge. If you’re aiming for the absolute highest germination rate possible, you could experiment with stratification. But for most home growers, it’s perfectly fine to sow the seeds directly without pre-treatment.
If you’re unsure about the origin or specific variety of your sycamore seeds, a short stratification period (e.g., 30-60 days in moist sand at around 40°F) won’t hurt and might even help. It’s a low-risk way to potentially boost your success rate, especially if you’re dealing with older or less-than-ideal seeds.
Here’s a quick rundown:
- American sycamore seeds typically don’t need stratification.
- Stratification may improve germination rates in some cases.
- If in doubt, a short stratification period is a safe bet.
- Always ensure proper moisture levels during stratification to prevent the seeds from drying out.
Choosing the Right Potting Mix and Containers for Seedlings
Okay, so you’ve got your sycamore seeds ready to go. Now, let’s talk about where they’re going to live for the first few months. The right potting mix and container can really make or break your seedling’s early development. It’s not just about throwing some dirt in a pot; it’s about creating an environment where those tiny roots can thrive.
The goal is to provide good drainage, aeration, and the right nutrients without overwhelming the delicate seedlings.
First off, let’s talk about potting mix. You want something that’s light and fluffy, not heavy and compacted. Think of it like this: those little roots need to be able to breathe! A heavy soil will suffocate them. You can buy seed-starting mixes at pretty much any garden center, and they’re usually a good bet. Or, you can make your own. A simple mix of peat moss, vermiculite, and perlite works well. Just make sure whatever you use is sterile to avoid any nasty fungal diseases that can wipe out your seedlings.
Here’s a basic recipe for a DIY seed-starting mix:
- 1 part peat moss (or coconut coir)
- 1 part vermiculite
- 1 part perlite
Now, about containers. You have a few options here. Seed trays are great for starting a lot of seeds at once, but you’ll eventually need to transplant them. Small pots (like 2-3 inches) are another good choice. You can also use recycled containers like yogurt cups or plastic takeout containers, just make sure to poke some drainage holes in the bottom. Good drainage is key to preventing root rot.
I’ve found that using biodegradable pots can be a real time-saver. You can plant the whole pot directly into the ground when the seedling is ready, which minimizes transplant shock. Plus, it’s better for the environment.
Here’s a quick rundown of container options:
- Seed Trays: Good for starting many seeds, requires transplanting.
- Small Pots (2-3 inches): Convenient for individual seedlings.
- Recycled Containers: Budget-friendly, ensure good drainage.
- Biodegradable Pots: Reduce transplant shock, eco-friendly.
No matter what you choose, make sure your containers are clean. A quick wash with soap and water will do the trick. This helps prevent the spread of diseases. And remember, good drainage is non-negotiable. Your sycamore seedlings will thank you for it.
How to Sow Seeds: Depth, Spacing & Soil Setup

Okay, so you’ve got your sycamore seeds ready to go. Now comes the fun part: actually planting them! It’s not rocket science, but a few key things can boost your success rate. Let’s talk about how deep to plant, how much space to give each seed, and how to set up your soil for happy seedlings.
Seed Depth: Not Too Deep, Not Too Shallow
The general rule of thumb is to plant sycamore seeds about 1/8 inch (around 0.3 cm) deep. These seeds are small, and they don’t have a ton of stored energy to push through a thick layer of soil. Planting too deep can prevent them from ever reaching the surface. On the other hand, if they’re right on top of the soil, they might dry out too quickly.
Spacing: Give Them Room to Breathe
When you’re sowing seeds in a tray or container, don’t overcrowd them. I usually aim for about 1-2 inches of space between each seed. This gives the seedlings enough room to develop without competing for light and nutrients early on. You can always transplant them later if needed. Overcrowding can lead to weak, spindly seedlings that are more susceptible to disease. Think of it like giving each kid their own space in the back seat on a long road trip – everyone’s happier.
Soil Setup: Drainage is Key
Sycamore seeds need a well-draining soil mix to thrive. Soggy soil is a recipe for disaster, as it can lead to root rot and other fungal problems. I like to use a mix of:
- Potting soil: Provides a good base for nutrients and moisture retention.
- Perlite or vermiculite: Improves drainage and aeration.
- Peat moss or coconut coir: Helps retain moisture without becoming waterlogged.
A good soil mix is like a good foundation for a house. It provides the support and resources that your seedlings need to grow strong and healthy. Don’t skimp on this step.
Here’s a simple table to visualize the soil mix ratio:
| Ingredient | Percentage | Purpose |
| Potting Soil | 50% | Base nutrients and moisture retention |
| Perlite/Vermiculite | 25% | Drainage and aeration |
| Peat Moss/Coir | 25% | Moisture retention without waterlogging |
Make sure your container has drainage holes! This is non-negotiable. Excess water needs to escape, or your seeds will be sitting in a swamp. I’ve learned this the hard way more than once. You can also use a shallow tray to start the seeds.
Ideal Germination Conditions: Moisture, Temperature & Light
Okay, so you’ve got your sycamore seeds ready to go. Now comes the fun part: getting them to sprout. It’s all about creating the right environment. Think of it like setting up a cozy little nursery for your future trees. Here’s what you need to keep in mind:
Moisture Matters
Consistent moisture is key for successful germination. You don’t want the soil to be soaking wet, but definitely not bone dry either. Imagine a wrung-out sponge – that’s the level of moisture you’re aiming for. I usually check the soil daily. If the top inch feels dry to the touch, it’s time for a little water. A spray bottle works great for gently moistening the soil without disturbing the seeds.
Temperature is a Trigger
Sycamore seeds like it warm to get going. Think late spring or early summer temperatures.
| Temperature Range | Germination Rate |
| 65-75°F (18-24°C) | Moderate |
| 75-85°F (24-29°C) | Optimal |
| Below 65°F | Slow/Dormant |
| Above 85°F | Reduced |
I’ve found that keeping the seed tray indoors, where the temperature is more stable, really helps. A heat mat designed for seed starting can also be a game-changer, especially if you’re starting your seeds in a cooler environment. Just be sure to monitor the soil moisture closely, as heat mats can dry things out quickly. You can also cover the seed tray with a humidity dome to help retain moisture and warmth.
Let There Be (Indirect) Light
While sycamore seeds need light to germinate, direct sunlight can be too harsh, especially for tender seedlings. Aim for bright, indirect light. A spot near an east-facing window is usually ideal. If you don’t have a good natural light source, you can use grow lights. Just make sure to position them a few inches above the seed tray to avoid burning the seedlings. I usually keep the lights on for about 14-16 hours a day.
Remember, patience is a virtue when it comes to seed starting. Germination can take anywhere from a few weeks to a couple of months, depending on the conditions. Don’t get discouraged if you don’t see sprouts right away. Just keep the soil moist, the temperature warm, and the light bright, and eventually, you’ll be rewarded with tiny sycamore seedlings ready to grow into majestic trees. To help with the process, consider using a seed starting mix for optimal results.
Transplanting Seedlings to Pots: When & How
Okay, so you’ve got some tiny sycamore seedlings popping up! That’s awesome. Now comes the slightly nerve-wracking part: moving them into their own pots. Don’t worry, it’s not as hard as it sounds. The goal here is to give each seedling enough space to develop a strong root system before it eventually goes into the ground.
First off, you’ll want to keep an eye on your seedlings. The ideal time to transplant is when they have their first set of true leaves (those are the ones that look like miniature versions of adult sycamore leaves) and are big enough to handle without crushing them. Usually, this happens a few weeks after germination. Don’t rush it, but don’t wait too long either, or the roots might get tangled together.
Here’s a simple step-by-step:
- Prepare your pots: Get some small pots ready. Something like 3-4 inch pots are perfect. Fill them with a good-quality potting mix. You can even mix in some soil from where you plan to eventually plant the tree to help it adjust later. Moisten the soil before you start.
- Gently remove the seedlings: This is the tricky part. Use a small spoon or even a popsicle stick to carefully lift each seedling out of the tray. Try to get as much of the root ball as possible. Be super gentle – those roots are fragile.
- Plant the seedlings: Make a small hole in the center of the soil in each pot. Place the seedling in the hole and gently cover the roots with soil. Don’t pack the soil down too tightly. You want the roots to be able to breathe.
- Water and care: Water the newly transplanted seedlings gently. You don’t want to wash them away. Place the pots in a spot with indirect sunlight. Keep the soil moist, but not soggy.
Transplanting is a bit of a shock to the seedlings, so don’t be surprised if they look a little droopy for a day or two. Just keep an eye on them, water them when the soil feels dry, and they should perk up soon enough. It’s all about providing a stable environment for them to grow. Think of it as giving them their own little apartments after living in a crowded dorm.
After transplanting, you can start thinking about planting in the landscape in the future. Just make sure the seedlings are strong enough before you move them outside permanently.
Caring for Young Sycamores: Watering, Fertilizer & Light Needs
Okay, so you’ve got your little sycamore seedlings popping up – awesome! Now comes the part where you keep them alive and thriving. It’s not rocket science, but it does take a little attention to detail. Think of it like raising a puppy, but, you know, a tree.
Watering Your Sycamore Seedlings
Watering is probably the trickiest part, especially when they’re tiny. You don’t want to drown them, but you also don’t want them to dry out completely. The goal is consistently moist soil, not soggy soil.
- Check the soil moisture daily. Stick your finger about an inch into the soil. If it feels dry, it’s time to water.
- Water deeply but infrequently. When you water, soak the soil until water drains out the bottom of the pot. This encourages deep root growth.
- Adjust watering based on the weather. Hot, sunny days will dry out the soil faster than cool, cloudy days.Newly planted sycamores need more attention.
- Use a watering can or a gentle hose setting to avoid disturbing the seedlings.
Fertilizing Your Sycamore Seedlings
Once your seedlings have a few sets of true leaves, you can start thinking about fertilizer. They need nutrients to grow big and strong, just like us. But don’t go overboard.
- Start with a balanced liquid fertilizer diluted to half strength. Something like a 10-10-10 or 20-20-20 will work fine.
- Fertilize every 2-4 weeks during the growing season (spring and summer). Skip fertilizing in the fall and winter when growth slows down.
- Always water the seedlings before fertilizing to avoid burning the roots.
- Look for signs of nutrient deficiencies, like yellowing leaves, and adjust your fertilizing schedule accordingly.
Light Needs for Sycamore Seedlings
Sycamores are sun-loving trees, so your seedlings will need plenty of light. But direct, scorching sunlight can be too much for young plants, especially when they’re indoors.
- Aim for at least 6 hours of indirect sunlight per day. A south-facing window is usually a good bet.
- If you don’t have enough natural light, you can supplement with a grow light. Position the light a few inches above the seedlings.
- Rotate the pots regularly to ensure even growth. Seedlings will tend to lean towards the light source.
- Watch out for signs of too much light, like scorched leaves, and adjust the position of the seedlings accordingly.
Remember, every seedling is different, so pay attention to your plants and adjust your care routine as needed. Don’t be afraid to experiment a little to find what works best for you and your sycamores. And most importantly, have fun! Growing trees from seed is a rewarding experience, and you’ll be amazed at how quickly your little seedlings grow into towering giants.
Hardening Off and Out Planting: Preparing for the Outdoors
Okay, so you’ve babied your little sycamore seedlings, and they’re looking pretty good. Now comes the slightly scary part: getting them ready for the real world. This is where “hardening off” comes in. It’s basically like tree boot camp, toughening them up before they face the elements. Then, we’ll talk about actually planting them outside. It’s not rocket science, but there are a few things to keep in mind to give your sycamores the best start.
The Hardening-Off Process
Hardening off is all about gradually exposing your seedlings to outdoor conditions. Think of it as easing them into the temperature changes, wind, and stronger sunlight. You can’t just plop them outside after their cozy indoor life; they’ll get shocked and probably die. I learned that the hard way with some tomatoes a few years back. The goal is to acclimate them over a week or two.
Here’s a basic schedule you can adapt:
- Days 1-3: Put the seedlings outside in a sheltered spot (like a porch or patio) for just a couple of hours each day. Make sure it’s a spot with indirect sunlight and protection from strong winds.
- Days 4-7: Increase the time they spend outside by an hour or two each day. Start introducing them to a little more sunlight.
- Days 8-14: Gradually expose them to more and more direct sunlight and wind. If the weather is particularly harsh (heavy rain, strong winds, frost), bring them back inside.
- Check the weather forecast! If there’s a sudden cold snap, bring your seedlings indoors, no matter where you are in the hardening-off process.
Choosing the Right Location for Our Planting
American sycamores are big trees, so location is key. They need plenty of space to spread out, both above and below ground. Don’t plant them too close to your house, power lines, or other structures. Their roots can be pretty aggressive, so avoid planting them near septic systems or water pipes. You’ll want to consider the ideal germination conditions for the seeds to thrive.
Here are some things to consider:
- Sunlight: Sycamores love full sun, meaning at least six hours of direct sunlight per day.
- Soil: They’re pretty adaptable to different soil types, but they prefer well-drained soil. Avoid planting them in areas that stay soggy after rain.
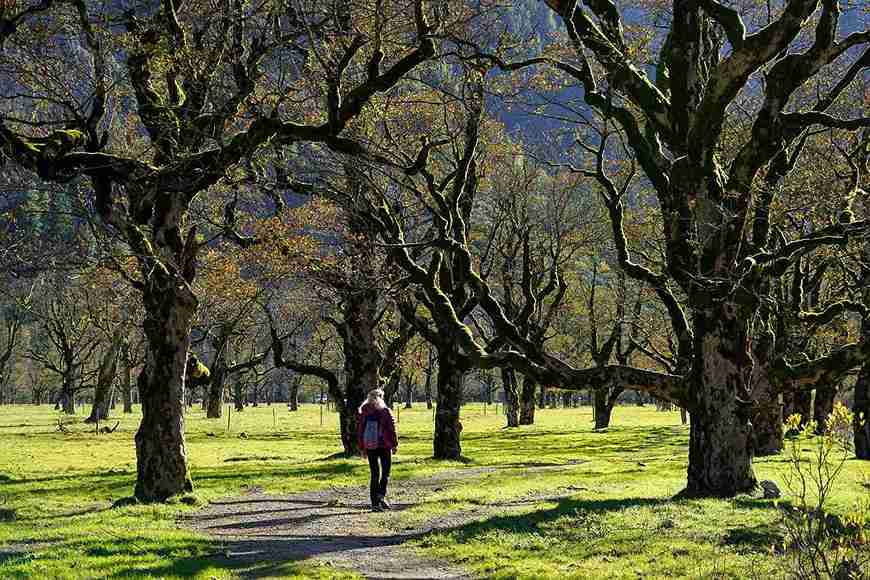
- Space: Give them plenty of room! They can easily reach 70-100 feet tall and wide.
Out planting your Sycamore Seedlings
Okay, your seedlings are hardened off, and you’ve picked the perfect spot. Now it’s time to plant! Here’s a step-by-step guide:
- Dig a hole: Make it twice as wide as the root ball and just as deep.
- Remove the seedling from its pot: Gently loosen the roots if they’re circling around the pot.
- Place the seedling in the hole: Make sure the top of the root ball is level with the ground.
- Backfill the hole: Use the soil you dug out, and gently tamp it down around the roots.
- Water thoroughly: Give the newly planted seedling a good soaking.
- Mulch: Add a layer of mulch around the base of the tree to help retain moisture and suppress weeds. Keep the mulch a few inches away from the trunk to prevent rot.
Post-Planting Care
After planting, keep an eye on your new sycamore. Water it regularly, especially during dry spells. You might want to add some fertilizer in the spring to give it a boost. Protect it from pests and diseases, and prune it as needed to maintain its shape. With a little care, your sycamore will grow into a beautiful, majestic tree for generations to come. Remember to check out caring for young sycamores for more information.
Planting trees is an act of optimism. You’re not just planting something for yourself; you’re planting something for the future. It’s a small thing you can do to make the world a little bit better.
Troubleshooting Common Issues: Pests, Diseases & Tips for Success
Okay, so you’ve babied your sycamore seedlings, and now things might get a little bumpy. Don’t panic! Every plant faces challenges. Here’s how to tackle some common problems and keep your sycamores thriving.
Early detection is key to preventing major issues. Regularly inspect your seedlings and young trees for any signs of trouble.
- Leaf Spots: These can be caused by fungi. Improve air circulation and avoid overhead watering. A fungicide might be needed in severe cases.
- Aphids: These tiny pests suck sap from leaves. A strong blast of water from a hose can dislodge them. Insecticidal soap is another option.
- Powdery Mildew: This looks like a white powder on the leaves. Again, good air circulation is important. Fungicides can help.
Remember that healthy plants are less susceptible to pests and diseases. Make sure your sycamores get enough sunlight, water, and nutrients. A little bit of prevention goes a long way.
If you’re seeing yellowing leaves, it could be a sign of overwatering or nutrient deficiency. Check the soil moisture and consider a balanced fertilizer. If the leaves are wilting, it could be underwatering or root rot. Adjust your watering schedule accordingly. For pest problems, consider natural solutions before resorting to harsh chemicals. Good luck!
Having trouble with your plants? Don’t worry! Our guide, “Fixing Common Plant Problems: Bugs, Sickness & Growing Tips,” has easy answers. Learn how to keep your plants healthy and happy.Click here to find out more!
Frequently Asked Questions
How do I pick the best spot to plant my American Sycamore tree?
American Sycamore trees can grow quite tall and wide, so it’s super important to pick a spot where they’ll have plenty of room to spread out without bumping into buildings or power lines. They also like lots of sunshine and soil that drains well.
When is the best time to collect sycamore seeds?
You should gather sycamore seeds in the late fall or early winter. Look for the round, spiky seed balls that have fallen from the tree. They usually turn brown and break apart easily when they’re ready.
Do sycamore seeds need to be chilled before planting?
Yes, sycamore seeds usually need a cold, moist period before they sprout. This is called stratification. You can do this by putting them in a damp paper towel inside a plastic bag in your fridge for a few months.
How deep should I plant sycamore seeds?
When you plant the seeds, don’t bury them too deep. Just press them gently into the soil, about 1/8 inch down. Make sure the soil is moist and keep the seeds in a warm spot with indirect light.
How long does it take for sycamore seeds to sprout?
Sycamore seeds usually start to sprout within 2 to 4 weeks if they have the right conditions. Keep the soil moist and warm, around 70-75°F, and give them plenty of light.
When can I move my sycamore seedlings to bigger pots?
Once your seedlings are about 4-6 inches tall and have a few sets of true leaves, they’re ready to move to their own small pots. Be gentle when you move them so you don’t hurt their roots.
What’s the best way to care for young sycamore trees?
Young sycamores need regular watering to keep the soil consistently moist, but not soaking wet. They also benefit from a balanced liquid fertilizer every few weeks as they grow.
What are some common problems when growing sycamore trees, and how can I fix them?
Sycamores can sometimes get certain pests or diseases, like aphids or powdery mildew. It’s a good idea to check your trees often and deal with any problems quickly. Keeping the area around the tree clean helps a lot, too.