Black Cherry Plum Bonsai: Care, Styling, and Growing Guide
- By Henry More
- September 29, 2025
When I first got into bonsai, I was drawn to the flowering varieties, and the black cherry plum tree quickly became a favorite. It’s not just any fruit tree; it’s a miniature version of a plant that offers both delicate blossoms and, yes, actual fruit. The “black cherry plum” name itself is a bit of a blend, often referring to varieties within the Prunus genus that produce dark, plum-like fruits and sometimes have cherry-like flowers. These trees are special because they bring a touch of the ephemeral beauty of cherry blossoms, often associated with Japanese culture, right into your home or garden, but with the bonus of edible fruit.
What Is the Black Cherry Plum Bonsai & Why It’s Special
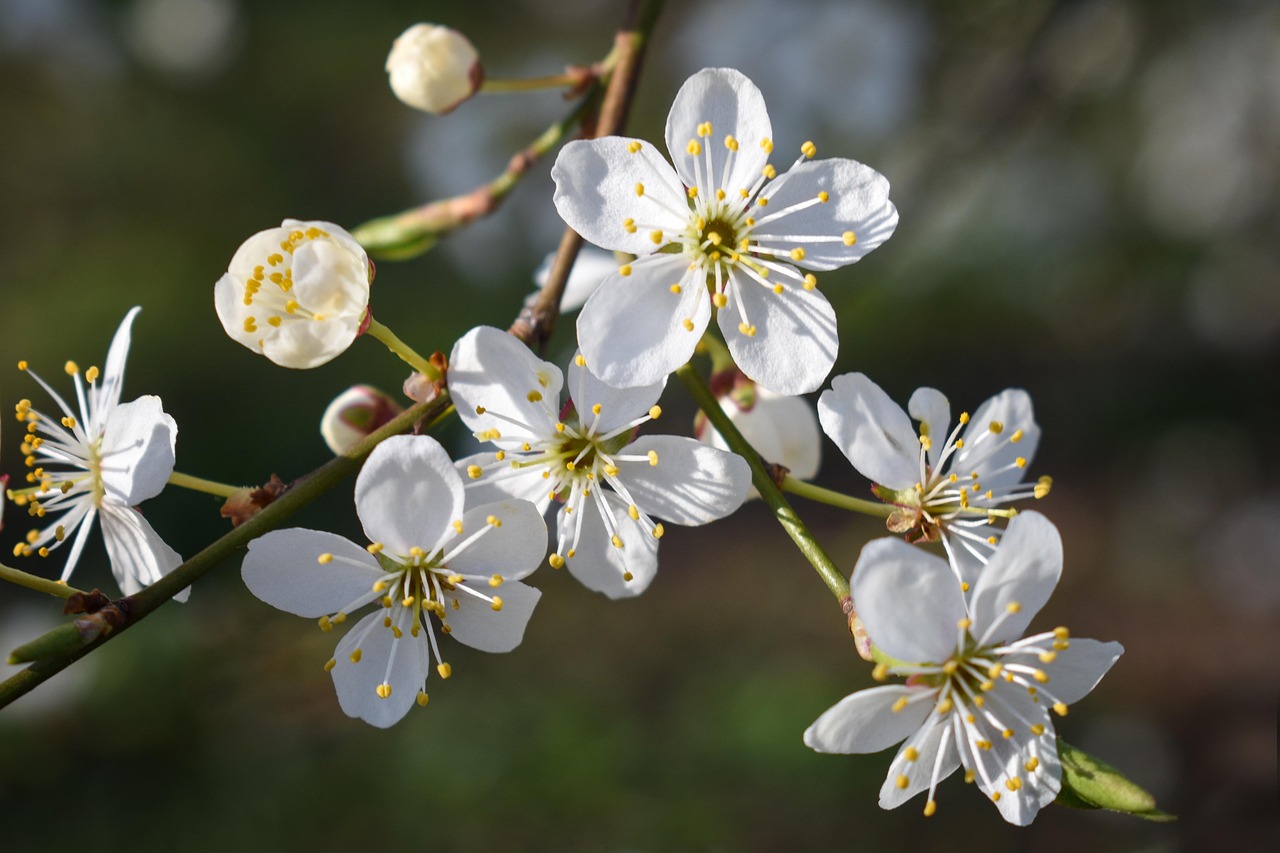
What makes the black cherry plum bonsai stand out for me is its dual appeal. You get the visual treat of spring flowers, which can range from white to pink depending on the specific cultivar. Then, as the season progresses, small, dark fruits develop. These aren’t just ornamental; they’re edible, tasting somewhat like a tart plum or a cranberry, and are packed with Vitamin C. It’s a living piece of art that also provides a small harvest.
Here’s a quick look at what makes this bonsai so appealing:
- Seasonal Interest: Offers flowers in spring and fruit in summer/fall.
- Edible Fruit: The small plums are a tasty bonus.
- Adaptable Growth: Responds well to pruning and shaping, making it ideal for bonsai art.
- Hardy Nature: Generally robust, though specific care is needed.
While many associate cherry trees with ornamental blossoms, the black cherry plum brings a functional aspect to bonsai, allowing growers to enjoy both aesthetic beauty and a small, edible yield. It’s a rewarding plant for those who appreciate a tree that offers more than just visual appeal.
Starting with a black cherry plum bonsai means you’re embarking on a journey with a tree that has a rich history and a lot to offer. It’s a plant that connects you to nature’s cycles in a very tangible way, from the first unfurling leaves to the final harvest of its dark, jewel-like fruits.
Choosing the Right Environment for Your Black Cherry Plum Bonsai
Finding the perfect spot for your Black Cherry Plum bonsai is pretty important if you want it to thrive. I’ve learned that these trees really appreciate a good balance of light and protection. They need plenty of sunlight, but direct, harsh afternoon sun can scorch their leaves and flowers. Think of it like this: they like a bright room with curtains that diffuse the light, rather than sitting right in a window all day long.
Outdoors is generally the best place for them year-round. They need that natural cycle of seasons. During the warmer months, a location that gets morning sun and then some shade in the afternoon is ideal. This helps keep the soil from drying out too quickly and prevents stress on the tree. When winter rolls around, they need a cool period to rest, but since they’re in pots, their roots are more exposed to the cold than if they were in the ground. I usually wrap the pot in burlap or bubble wrap, or even put it in a sheltered spot, to protect the roots from extreme freezes.
When I’m deciding on placement, I also consider wind. Strong winds can dry out the soil and damage delicate branches. So, I try to find a spot that offers some natural protection, maybe near a wall or a larger shrub, but still allows for good air circulation. It’s a bit of a balancing act, really. Getting the environment right from the start makes all the difference in how well your bonsai grows and looks.
Here’s a quick rundown of what I look for:
- Light: Bright, but protected from intense afternoon sun. Dappled light is great.
- Temperature: Outdoors year-round is best. They need warm summers and cool winters.
- Protection: Shield from strong winds and extreme heat.
- Water: Keep soil consistently moist, but not waterlogged. Rainwater is preferred if possible.
It’s all about mimicking their natural habitat as closely as possible, just on a smaller scale. Paying attention to these details really helps your Black Cherry Plum bonsai flourish and gives you that beautiful display you’re aiming for. For more on light needs, you might find information on Eastern Redbuds helpful, as they share some similar preferences for sun exposure.
Setting the Stage for a Black Cherry Plum Bonsai
Getting the soil, pot, and placement right is pretty much the foundation for a happy Black Cherry Plum bonsai. I’ve found that these trees really thrive when their roots have good drainage, which is super important. Most commercially available bonsai soils work well because they’re made specifically for these little trees. I usually aim for a mix that’s a bit acidic, somewhere around a pH of 5.5 to 6.5. This seems to keep them content.
When it comes to pots, you want something that complements the tree’s look, but also helps restrict root growth a bit and, of course, has good drainage holes. A general rule I follow is that the pot’s width and height shouldn’t be more than two-thirds of the tree’s height. It just looks more balanced that way, and it helps with keeping the roots in check.
Placement is also key. I’ve learned that these trees appreciate a sunny spot, but they can get a bit fussy with intense, direct afternoon sun, especially in the summer. A location that gets bright morning and evening light, with some protection from the harshest afternoon rays, seems to be the sweet spot. During the warmer months, I often move mine to a spot with dappled light. It’s also worth noting that while they need sun, they don’t like strong winds battering them. For overwintering, since they’re in pots, their roots are more exposed. I usually wrap the pot in burlap or place it in a sheltered spot to protect it from extreme cold. It’s a good idea to check out bonsai tree care for more general tips.
Here’s a quick rundown of what I look for:
- Soil: Well-draining, slightly acidic mix (pH 5.5-6.5).
- Pot: Good drainage, size proportionate to the tree (no more than 2/3 the tree’s height).
- Placement: Sunny, but protected from harsh afternoon sun and strong winds.
Making sure the environment is just right from the start really sets your Black Cherry Plum bonsai up for success. It’s all about mimicking their natural conditions as much as possible, just on a smaller scale.
Planting & Propagation: How to Start a Black Cherry Plum Bonsai
Starting a Black Cherry Plum bonsai can be a rewarding experience, and there are a few ways to go about it. I’ve found that propagation from cuttings is often the most straightforward method for beginners. You’ll want to take a 2 to 4-inch stem cutting from a healthy, established tree. It’s best to do this in spring before the buds fully open, or in summer when the wood is semi-hard.
When you’re ready to plant, prepare a bonsai pot with a layer of well-draining material like lava rock or grit, followed by a good bonsai soil mix. Insert the cutting about an inch deep into the soil. Keeping the soil consistently moist is key; avoid letting it dry out completely. Patience is important here. You’ll know roots have formed when you see new growth and the cutting doesn’t wiggle when you give it a gentle tug. This process can take some time, so don’t get discouraged if you don’t see results immediately.
Another method is grafting, which is how many cultivars are produced commercially. While this can be more complex, it often ensures you get a specific variety. Seed propagation is also an option, but it’s important to know that seedlings might not always retain the exact characteristics of the parent tree. If you’re looking for a specific look or bloom, grafting or purchasing a young tree might be a better route.
When planting or repotting, always use a well-draining soil mix. This is absolutely vital for cherry plum bonsai to prevent root rot. A slightly acidic pH, around 5.5 to 6.5, is ideal for these trees.
For those looking to start from scratch, here’s a basic breakdown of propagation:
- Cuttings: Take 2-4-inch cuttings from healthy branches in spring or summer. Remove lower leaves and plant in a moist, well-draining medium. Consider using a rooting hormone to encourage faster root development.
- Air Layering: This technique involves encouraging roots to form on a branch while it’s still attached to the parent tree. It’s a bit more involved, but it can yield a more mature specimen faster.
- Grafting: This is often used for specific cultivars. It involves joining a scion (a cutting from the desired tree) onto the rootstock of another tree. This requires precision and practice.
Remember, regardless of the method you choose, providing the right conditions from the start is paramount. This includes the correct soil, pot, and initial placement. Getting the foundation right will make all the subsequent care much easier. Learning about bonsai tree pruning is also a good idea early on, as it ties into shaping the tree as it grows.
Watering, Light & Temperature Requirements of Black Cherry Plum Bonsai
Getting the watering, light, and temperature just right for my Black Cherry Plum bonsai is something I’ve learned is pretty important. It’s not overly complicated, but you do need to pay attention.
When it comes to watering, the key is consistency. I aim to keep the soil evenly moist, but never soggy. A good rule of thumb for me is to check the top inch of soil; if it feels a bit dry, it’s time to water. During the active growing seasons, especially spring and summer, this means watering more often, sometimes even daily if it’s really hot. I try to use rainwater when I can, as my trees seem to do better with it than with hard tap water. Never let the soil dry out completely, especially when the tree is flowering or fruiting.
Light is another big one. My Black Cherry Plum bonsai really thrives in a sunny spot, but it needs protection from the harshest afternoon sun. I’ve found that dappled light or morning sun followed by some shade in the hottest part of the day works best. Too much direct, intense sun can scorch the leaves and flowers, which is a shame to see.
As for temperature, these trees generally like it warm during the growing season. They appreciate the heat of summer. However, they also need a cool period to rest during the winter. Because of this, I keep mine outdoors year-round. This allows them to experience the natural temperature fluctuations they need. If you’re in an area with very harsh winters, you might need to provide some protection for the roots, perhaps by wrapping the pot or moving it to a sheltered spot.
Here’s a quick rundown:
- Watering: Keep soil consistently moist, not waterlogged. Water when the top inch of soil is dry. Increase frequency in warm weather.
- Light: Full sun is great, but protect from intense afternoon sun. Dappled or morning light is ideal.
- Temperature: Prefers warm growing seasons and cool winters. Outdoor placement is generally best.
I’ve noticed that the soil can dry out much faster when the tree is in a small bonsai pot, especially on windy days. It’s always better to check the soil moisture more frequently than to guess.
For more on general bonsai care, looking into Brush Cherry bonsai care can offer some helpful insights, even though the specifics might vary slightly.
Pruning, Wiring & Styling Tips for Black Cherry Plum Bonsai
When it comes to shaping your Black Cherry Plum bonsai, I’ve found that a bit of patience goes a long way. It’s important to remember that these trees respond well to careful manipulation, but overdoing it can cause stress. I usually start by letting the new shoots grow out a bit before I decide where to prune. If you trim them too early, they can sometimes just die back, which is frustrating.
After the tree finishes its beautiful bloom, that’s my cue to start thinking about pruning. I’ll select older branches that need shortening, always making sure to leave some leaf buds on the branches I want to keep. It’s a balancing act, really. For shaping, I often let the new shoots extend for a while. Then, in the autumn, I’ll shorten these long shoots, leaving about two to five nodes on each. Major branch pruning and wiring are best saved for winter or very early spring, just before the new growth starts to emerge.
Wiring is another technique I use to guide the tree’s growth. I find it’s easiest to wire the tree when it doesn’t have any leaves on it, making it simpler to see what I’m doing. Older branches can be a bit stiff and might snap if you’re not careful, but they can often be shaped effectively using guy wires. Younger twigs, on the other hand, are quite flexible and easy to shape with wire. You can even wire new shoots during the growing season if you’re careful. Mastering bonsai wiring is key to achieving the desired aesthetic.
Here’s a general timeline I try to follow:
- Late Spring/Early Summer: After flowering, begin light pruning of new shoots to encourage branching and maintain shape. Avoid heavy pruning at this stage.
- Late Summer/Autumn: Shorten long shoots, leaving 2-5 nodes. This helps develop ramification and prepares the tree for winter.
- Winter/Early Spring: Perform heavier branch pruning and wiring. This is the best time to address thicker branches and set the tree’s structure for the coming season.
It’s always a good idea to have some well-draining lava rock or grit on hand when working with bonsai soil, especially if you’re considering taking cuttings. This helps ensure good aeration around the roots.
Remember, the goal is to create a miniature, natural-looking tree. Don’t be afraid to experiment, but always observe how your tree responds. You can find some great bonsai wiring kits that can help you get started with the right tools.
Nutrient Management & Fertilization for Black Cherry Plum Bonsai
Feeding your Black Cherry Plum bonsai is pretty important for keeping it healthy and looking good, especially when it’s actively growing. I usually start feeding in the spring as soon as I see new growth appearing. A balanced fertilizer is generally the way to go. I tend to avoid anything too heavy on the nitrogen, particularly for older trees that I want to encourage to flower. Too much nitrogen can lead to lots of leafy growth but fewer blooms.
I typically fertilize about once a month with a solid organic fertilizer, or if I’m using a liquid feed, I’ll do it every week or two. It really depends on the product and how the tree seems to be responding. It’s a good idea to keep an eye on your tree; if it looks a bit pale or growth seems slow, it might be hungry.
Here’s a general schedule I follow:
- Spring (March-May): Start feeding regularly as growth begins. Use a balanced fertilizer. I might switch to a bloom-booster type as flowering time approaches.
- Summer (June-August): Continue regular feeding. This is a key period for growth and fruit development, so consistent nutrients are important.
- Autumn (September-November): I gradually reduce the frequency of feeding as growth slows down. Some people stop feeding altogether by late autumn.
- Winter (December-February): No fertilizer needed during the dormant period. The tree is resting, and feeding can actually harm it.
When fertilizing, always make sure the soil is moist. Applying fertilizer to dry soil can burn the roots. It’s best to water the tree thoroughly a day before fertilizing, or water it in well after applying the fertilizer.
For young trees that are still developing their structure, I might use a fertilizer with a slightly higher nitrogen content to encourage vigorous growth. However, once the tree is established and I’m focusing on refinement and flowering, I’ll switch to a more balanced or bloom-focused formula. It’s also worth noting that some growers like to use a foliar feed occasionally, which can give the tree a quick boost. I’ve found that consistent feeding helps promote healthy growth and vibrant foliage for your Black Cherry Plum bonsai.
Pests, Diseases, and Seasonal Care for Black Cherry Plum Bonsai
Keeping a Black Cherry Plum bonsai healthy involves being aware of potential issues and knowing how to address them. I’ve found that vigilance is key, especially when it comes to pests and diseases.
Common unwelcome visitors include aphids, scale insects, and spider mites. These can often be managed with a strong spray of water from the hose, but if the infestation is more serious, I’ve had to resort to insecticidal soap or neem oil. It’s important to check the undersides of leaves and new growth regularly. Tent caterpillars and Japanese beetles can also be a problem, and I usually pick these off by hand when I see them.
Diseases can be a bit trickier. I’ve encountered leaf spot, powdery mildew, and occasionally root rot, especially if I’ve been a bit too generous with the watering. Ensuring good air circulation and proper drainage in the pot is my first line of defense. If I suspect root rot, I’ll repot the tree, trim away any affected roots, and use a fresh, well-draining soil mix. For fungal issues like powdery mildew, I’ll remove affected leaves and use a fungicide if necessary.
Here’s a quick rundown of what I look for:
- Aphids: Tiny green or black insects, often clustered on new growth.
- Scale: Small, immobile bumps on stems and leaves.
- Spider Mites: Very small, almost invisible pests that cause stippling on leaves and fine webbing.
- Powdery Mildew: A white, powdery coating on leaves.
- Leaf Spot: Discolored spots on the foliage.
Seasonal care is also quite important for my Black Cherry Plum. During the growing season, I make sure it gets plenty of sun but also some afternoon shade during the hottest part of summer. Winter dormancy is critical; I protect the roots from extreme cold by wrapping the pot in burlap or placing it in a sheltered, unheated garage or shed. I avoid watering too much in winter, letting the soil dry out slightly between waterings, but never letting it become bone dry. Repotting is best done in early spring, just before new growth begins, usually every two to three years for younger trees and less often for older ones. After repotting, I keep the tree in a slightly more sheltered spot until I see signs of new growth, as it’s more vulnerable then.
Dealing with problems often feels like a puzzle. My approach is to first identify the issue accurately, then choose the least invasive treatment that will be effective. Sometimes, a simple change in watering habits or placement can solve a problem that seems complex.
Is your Black Cherry Plum bonsai facing issues like bugs, sickness, or problems with the changing weather? Don’t let these common troubles ruin your beautiful tree. We’ve got easy tips to help you fix these problems and keep your bonsai healthy all year round. For more detailed advice and solutions, visit our website today!
Frequently Asked Questions
Can I keep my Black Cherry Plum Bonsai indoors?
I have found that Black Cherry Plum Bonsai trees really need to be outdoors. They require plenty of sunlight and fresh air to thrive. Keeping one inside might prevent it from flowering and could lead to a weaker plant.
How often should I water my Black Cherry Plum Bonsai?
During the growing season, I make sure to keep the soil consistently moist, but not soggy. I check the top inch of soil; if it feels a little dry, it’s time to water. I try to use rainwater when I can, as these trees don’t always like hard tap water.
When is the best time to prune my Black Cherry Plum Bonsai?
I usually wait until after the tree has finished blooming to do any pruning. This is typically in the summer. For shaping larger branches, I might do that in the winter or early spring before new growth starts.
What kind of soil is best for a Black Cherry Plum Bonsai?
Good drainage is key for this bonsai. I prefer to use a commercial bonsai soil mix because it’s formulated for good airflow and drainage. I also aim for slightly acidic soil.
How do I encourage my Black Cherry Plum Bonsai to bloom more?
To get more blooms, I ensure the tree gets enough sun and is properly fed. Sometimes, over-pruning can remove the flower buds, so I’m careful not to trim too much new growth. Protecting it from late frosts also helps.
What should I do if I notice pests on my Black Cherry Plum Bonsai?
I keep a close eye out for common pests like aphids or spider mites. Often, a strong spray of water can dislodge them. If the problem is more serious, I might use a specific pesticide, or sometimes, just removing the affected leaves by hand is enough.